
How to Organize Bulky Camping Gear: 7 Steps
Table of Contents
- Step 1: Categorize Your Gear by Activity and Season
- Step 2: Choose Best Storage Bins for Camping Gear
- Step 3: Implement a Labeling and Inventory Management System
- Step 4: Use Vertical Storage Solutions and Shelving
- Step 5: Master Camping Gear Storage Ideas for Small Spaces
- Step 6: Learn How to Store Sleeping Bags Long Term
- Step 7: Maintain Your Organization System and Rotate Seasonal Gear
- Common Mistakes to Avoid When Organizing Camping Gear
Last Updated: August 25, 2026
Step 1: Categorize Your Gear by Activity and Season
Start by separating gear into activity-based groups: backpacking, car camping, water sports, winter expeditions, or climbing. Then subdivide by season. This matters because gear you use monthly needs faster access than equipment you touch once a year. Seasonal rotation keeps your most-used items front and center while off-season gear moves to back shelves. According to the American Camping Association's gear storage guidelines, proper organization by season extends equipment lifespan by preventing unnecessary moisture exposure during inactive months.
Create grab-and-go kits within each category containing everything for a specific trip type: sleeping bag, pad, stove, and fuel all together. Write down what goes into each kit on a label or spreadsheet. Heavy items like tents and sleeping pads deserve their own section to prevent everything from becoming tangled. The goal is creating a system you'll actually maintain.
Step 2: Choose Best Storage Bins for Camping Gear
Heavy-duty plastic bins with secure lids protect against moisture, pests, and dust. Clear plastic bins are superior to opaque ones because you can see contents without opening every container. Size matters: a 90L waterproof hiking backpack like the 90L Waterproof Hiking Camping Backpack from AdventureTrailhead consolidates multiple items, while medium bins (50-60L) hold sleeping bags and pads, and small bins store stoves and repair kits.

Stackable bins with reinforced corners handle weight without crushing. Weatherproof lids prevent moisture seepage during humid months. If storing in an unheated garage or shed, place desiccant packs inside bins to absorb excess humidity and protect gear from mildew.
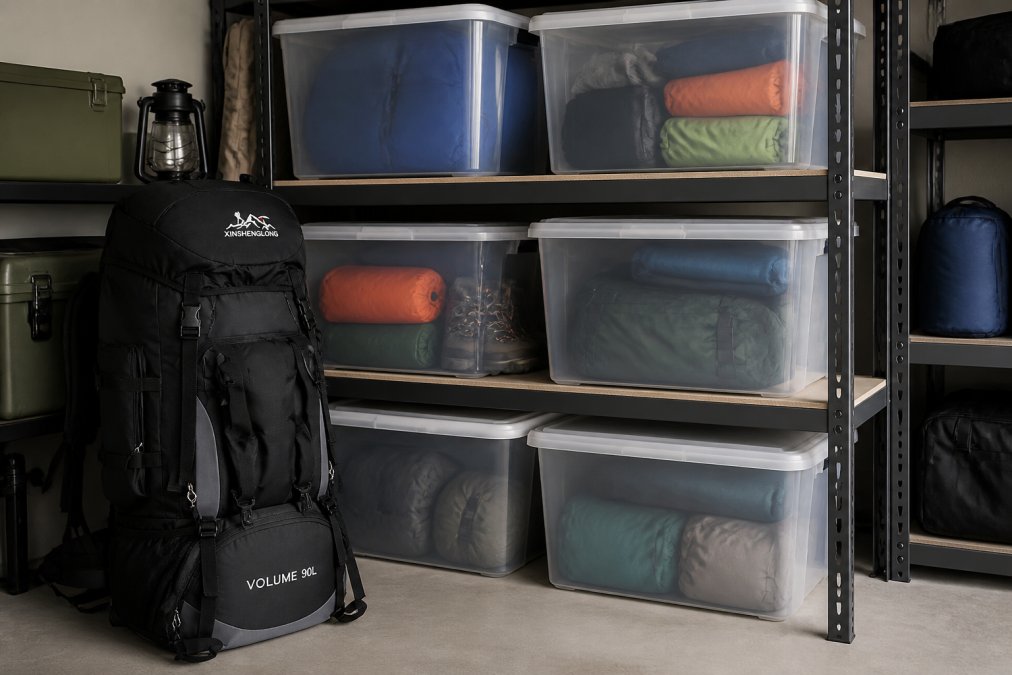
Avoid cardboard boxes entirely, they deteriorate, attract pests, and offer zero moisture protection. Use cloth storage bags inside plastic bins instead to allow gear to breathe internally while protecting the outside.
Step 3: Implement a Labeling and Inventory Management System
Use white tape or labels on the front and top of each bin with contents and season: "Winter Backpacking, Sleeping Bags" is clearer than generic labels. Create a master inventory spreadsheet listing every bin, its contents, and activity type. This prevents duplicate purchases and helps you remember what gear you own.
Take photos of each bin's contents before closing it up and store them on your phone or in a cloud folder. When planning a trip, a quick photo reference saves time. Label everything inside bins too, using waterproof labels so they don't fade. Include purchase dates to track gear age and plan replacements before equipment fails in the field.
Step 4: Use Vertical Storage Solutions and Shelving
Vertical space is your greatest asset. Install metal shelving units, they're durable and won't sag under heavy bins. Adjustable shelves let you customize spacing for different bin sizes. Hanging storage works well for trekking poles, rope, and straps on pegboards or wall-mounted hooks. This improves air circulation and helps prevent moisture buildup.
Consider ceiling-mounted racks with pulley systems for seasonal items you rarely access. This frees up floor and shelf space for frequently used items. Wall-mounted shelving units maximize vertical space in small storage areas by stacking bins vertically rather than spreading them horizontally.
Step 5: Master Camping Gear Storage Ideas for Small Spaces
Small-space storage requires ruthless efficiency. Vertical solutions become non-negotiable. Wall-mounted shelves and hanging storage dominate small-space strategies. Under-bed storage works for smaller gear items using flat containers that slide under beds for off-season equipment.
Closet organization systems transform unused closet space into functional gear storage. Install shelves, add hanging rods for soft goods, and use the door for pegboard storage. A single closet can hold surprising amounts of camping gear if organized vertically.
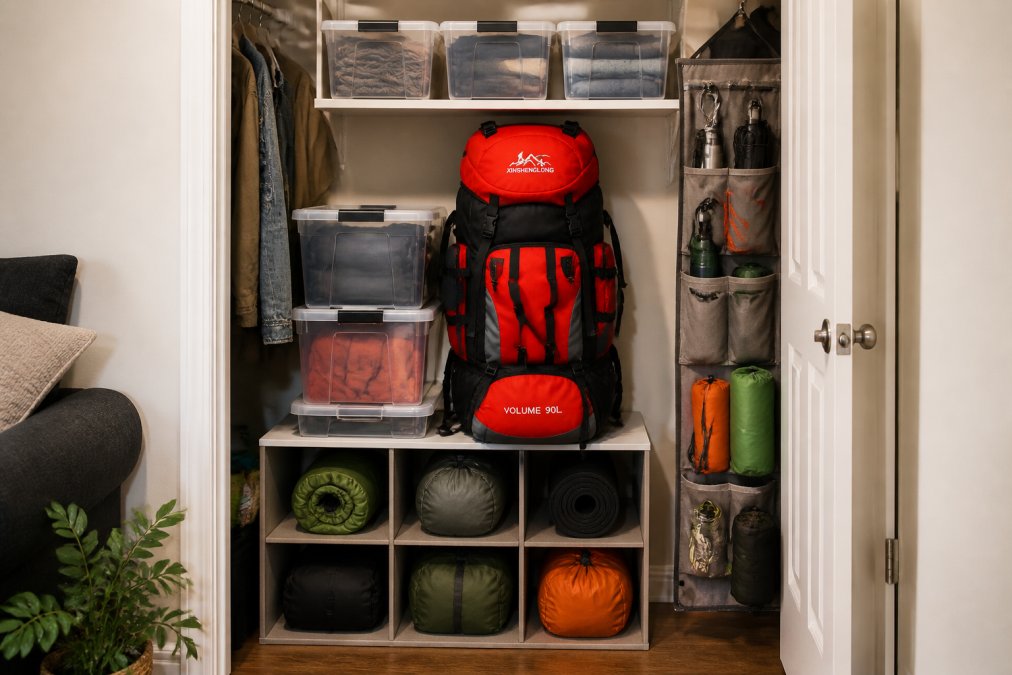
Modular storage cubes stack and interlock, creating custom configurations for awkward spaces. Combine cubes with cloth bins or baskets for an intentional look. Vacuum storage bags compress soft goods like sleeping bags by 70-80%, but use them only for seasonal gear you won't need for months. Never use vacuum storage for frequently accessed gear; constant compression damages materials.
Step 6: Learn How to Store Sleeping Bags Long Term
Never store sleeping bags compressed, compressed bags lose loft permanently, and loft is what keeps you warm. Store them loosely in breathable storage bags or hanging in a closet. A large mesh bag or cloth storage sack allows air circulation while protecting from dust.
Temperature stability matters for long-term storage. Aim for 50-70°F. A climate-controlled closet works better than an unheated garage or attic. Moisture is the enemy of sleeping bags. Before storing, ensure your sleeping bag is completely dry. Air it out in sunlight for a full day before packing. Inside the storage bag, place desiccant packs and replace them annually if storing for multiple years.
Inspect sleeping bags before storage and again before use. Look for tears, damaged zippers, or stains and address repairs immediately. Clean the bag according to manufacturer instructions. Store away from direct sunlight and heat sources in a dark storage area. Never store sleeping bags in plastic bins without ventilation; use breathable cloth storage bags inside bins to balance protection with air circulation.
Step 7: Maintain Your Organization System and Rotate Seasonal Gear
Set a maintenance schedule quarterly or seasonally to review and adjust storage. After each trip, return gear to its designated bin immediately. Seasonal rotation keeps your system functional: move off-season gear to less accessible storage and bring current-season equipment forward.
Update your inventory after each trip, noting if items need repair or if pieces are missing. Perform annual maintenance on stored gear, checking bins for moisture, inspecting equipment for damage, and replacing desiccant packs. Track gear age and plan replacements before equipment fails. According to outdoor gear maintenance guidelines from REI Co-op, annual inspections extend equipment lifespan significantly. The 40L Men Women Travel Backpack from AdventureTrailhead provides reliable mid-range capacity while you build your complete gear collection.

Common Mistakes to Avoid When Organizing Camping Gear
Mixing gear categories creates confusion when packing for specific trip types. Keep categories separate and clearly labeled. Storing gear while damp or dirty promotes mildew and material degradation. Always dry and clean gear before storage.
Over-compressing soft goods damages insulation permanently. Sleeping bags, down jackets, and insulated pads lose effectiveness when stored compressed. Ignoring moisture control in storage spaces leads to mold and mildew. Desiccant packs are cheap insurance.
Failing to create an inventory system leads to duplicate purchases and forgotten gear. A simple spreadsheet or photo inventory takes minimal effort and prevents expensive mistakes. Storing gear in cardboard boxes invites disaster, invest in plastic bins that last years and protect your equipment investment.
Not maintaining your system guarantees it will fail. Spend 30 minutes each season reviewing storage, checking for moisture, and rotating gear. This small investment keeps everything functional and accessible.
Organizing bulky camping gear transforms how you prepare for adventures. A proper system saves time before trips, protects your investment in quality equipment, and prevents frustration when you can't find what you need. Start with categorization, invest in quality bins, and maintain your system consistently. At AdventureTrailhead, we understand that gear organization directly impacts your ability to explore confidently. Our selection of durable backpacks and storage-friendly equipment is designed to work within organized systems. Gear storage best practices from the Outdoor Industry Association confirm that proper organization extends equipment lifespan and improves user satisfaction. Get started with AdventureTrailhead's high-quality camping gear and create a storage system that keeps your adventures organized and accessible.
Frequently Asked Questions
What is the best way to organize bulky camping gear in a small apartment?
Use vertical storage solutions like wall-mounted shelves and hanging organizers to maximize limited floor space. Clear plastic bins stack efficiently in closets, and under-bed storage works well for items you don't access frequently. Modular storage systems adapt to your available space. Prioritize accessibility for gear you use regularly, and store off-season items higher up or in harder-to-reach spots.
How do you store sleeping bags long term without damage?
Store sleeping bags in a cool, dry place away from direct sunlight and moisture. Avoid compressing them in stuff sacks for extended periods, as this damages the insulation. Instead, hang them loosely or store them in breathable mesh bags. Include desiccant packs to control humidity and prevent mold. Check periodically for moisture or pest damage, and ensure the storage area maintains stable temperatures year-round.
What are the best storage bins for camping gear?
Heavy-duty, clear plastic bins work best because they're durable, stackable, and let you see contents without opening them. Choose weatherproof containers if storing in a garage or shed. For bulky items like tents and sleeping pads, larger bins (50+ quarts) reduce clutter. Label every bin clearly with contents and season. Avoid cardboard boxes, which absorb moisture and attract pests. Ensure bins have tight-sealing lids to protect gear from dust and humidity.
How should I label my camping gear storage system?
Use a consistent labeling system with both text and color-coding by season or activity type. Include item names, quantity, and the date stored. Waterproof labels work best for bins in damp environments. Create a master inventory list (digital or printed) that matches your bin labels. This makes it easy to find items, prevents duplicate purchases, and helps you rotate seasonal gear efficiently. Update your inventory after each trip.
This article was written using GrandRanker