
How to Properly Fit a Multi-Day Backpacking Pack
Table of Contents
- Why Backpacking Pack Fit Determines Your Entire Trip
- How to Measure Torso Length for a Backpack
- How to Adjust a Backpack Hip Belt for Load Transfer
- Shoulder Straps, Load Lifters, and Sternum Strap Positioning
- Backpack Weight Distribution Tips for Multi-Day Loads
- Dynamic Adjustments on the Trail
-
Common Mistakes to Avoid When Fitting a Backpacking Pack
- Mistake 1: Sizing by Height Instead of Torso Length
- Mistake 2: Tightening Shoulder Straps First
- Mistake 3: Wearing the Hip Belt in the Wrong Place
- Mistake 4: Over-Tightening Load Lifters
- Mistake 5: Skipping the Sternum Strap
- Mistake 6: Packing Heavy Gear at the Top
- Mistake 7: Never Re-Adjusting on the Trail
- Mistake 8: Assuming One Fit Works for Every Body
- Mistake 9: Buying Based on Volume Alone
- Frequently Asked Questions
Last Updated: September 21, 2026
Why Backpacking Pack Fit Determines Your Entire Trip
A poorly fitted pack ruins a multi-day trek faster than bad weather or steep terrain. Learning how to properly fit a multi-day backpacking pack is the most important skill you can build before the trailhead.
How to Measure Torso Length for a Backpack
Torso length is the distance from your C7 vertebra to your iliac crest. This measurement, not your height, determines your correct pack size.
Finding Your C7 Vertebra and Iliac Crest
The C7 vertebra is the bony bump at the base of your neck. Tilt your head forward and feel for the most prominent knob at the top of your spine.
Torso Length vs. Pack Size
Match your measurement to the pack's size chart, and always check the specific manufacturer's guide, since sizes vary by brand.
| Torso Length | Typical Pack Size | Who It Fits |
|---|---|---|
| Under 16 inches | Extra small | Shorter frames, teens |
| 16-18 inches | Small | Most women, shorter men |
| 18-20 inches | Medium | Average adult frames |
| 20-22 inches | Large | Taller frames, long torsos |
| Over 22 inches | Extra large | Very tall hikers |
How to Adjust a Backpack Hip Belt for Load Transfer
The hip belt carries 80% or more of your pack weight. Adjusting it correctly is the difference between a comfortable trek and four days of shoulder pain.
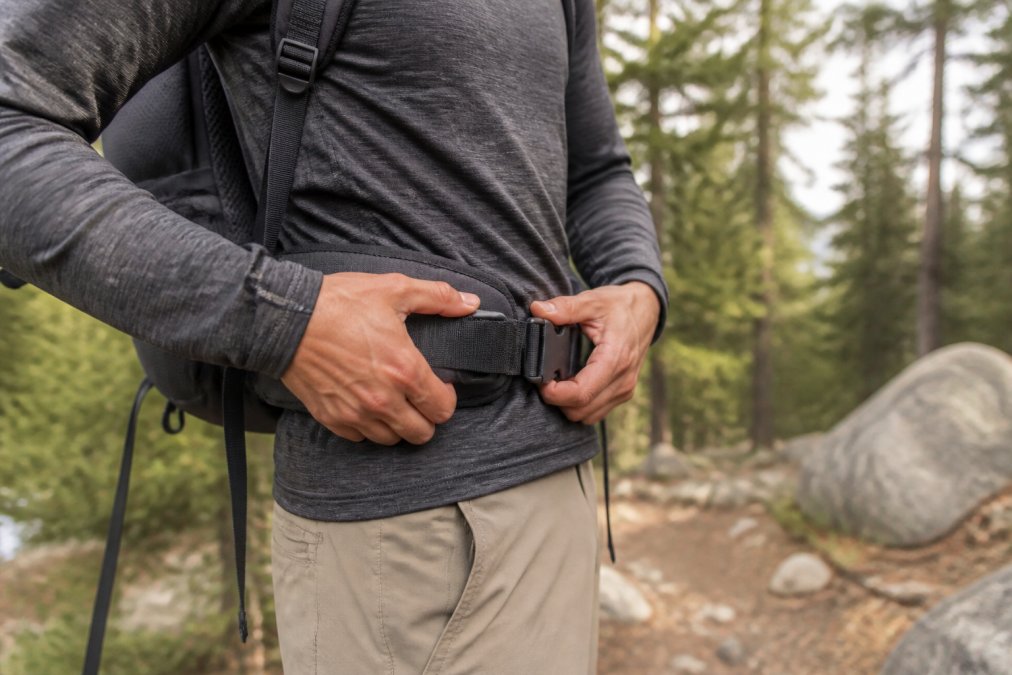
Positioning the Hip Belt on the Iliac Crest
Put on your loaded pack and let it settle. The hip belt's center should sit directly on top of your iliac crest, not above, not below.
Tensioning and Buckle Placement
Tighten until snug but not painful, you should be able to slide two fingers under the belt, no more.
Shoulder Straps, Load Lifters, and Sternum Strap Positioning
Shoulder straps curve over your shoulders and anchor the pack close to your back, carrying a small share of the weight and mostly keeping the pack stable.
Load Lifter Angle and Tensioning
Load lifters are the small straps running from the shoulder strap up to the top of the pack frame.
Backpack Weight Distribution Tips for Multi-Day Loads
Where you place weight inside the pack matters as much as how the pack sits on your body. Poor packing defeats even a perfect fit.
Packing Order: Heavy vs. Light Items
Pack in this order, from the bottom up:
- Sleeping system at the bottom: sleeping bag and pad
- Heavy items in the middle, close to your spine: food, stove, water
- Light items at the top: extra layers, rain shell
- Frequently used gear in side and hip pockets: snacks, map, phone
- Hydration reservoir in the sleeve against your back
Never pack heavy items at the top or far from your spine. Both positions pull you backward and force your shoulders to work harder.
Compression Straps and Frame Sheet Stabilization
Compression straps pull the load tight against the frame sheet, the stiff panel that gives the pack its shape. Tighten them after packing to stop contents shifting.
Dynamic Adjustments on the Trail
Almost every fitting guide stops at the trailhead. That is a mistake: a pack that feels dialed in at the car will feel different at mile eight, because your body changes shape underneath the harness.
A Practical Re-Adjustment Rhythm
Use rest breaks as your cue, and work in the same bottom-up order you used at the trailhead.
- Every break, first: Re-snug the hip belt, pulling straps outward and forward, not down. You are usually taking up an inch or two of slack from sweat and movement.
- Before a long climb: Loosen the sternum strap one notch and let the shoulder straps out slightly. A forward lean plus a tight chest strap restricts breathing when you need lung capacity most.
- Before a long descent: Tighten the load lifters and shoulder straps a touch, pulling the pack tight against your back so it does not bounce or swing behind you on steep steps.
- When you add or remove a layer: Re-check the shoulder straps and sternum strap. A puffy jacket under the harness can add a half-inch of stack height, changing where the load lifters sit.
- At camp: Loosen the hip belt, shoulder straps, and load lifters before taking the pack off. Yanking a loaded pack off tight straps is how buckles and stitching fail.
Why This Matters More on Multi-Day Trips
On a day hike, a slightly off fit is annoying for a few hours. On a multi-day trek, small problems compound: a hip belt that slips a quarter-inch per hour means by day three you are carrying weight on your shoulders that your hips should be carrying, and a sternum strap tight on every climb adds up to restricted breathing over hundreds of vertical feet.
Body Type Changes the Tweak, Not Just the Setup
Dynamic adjustment is not one-size-fits-all, because frame geometry interacts with your build.
- Petite frames: Shorter torsos mean less room between the hip belt and load lifters. Adjust a quarter-inch at a time, the same pull that is subtle on a tall frame can bottom out the range on a short one.
- Tall frames: Longer torsos give more strap to work with but more leverage for the pack to swing. Tall hikers usually need to tighten load lifters more aggressively on descents.
- Broad shoulders or chest: A sternum strap at collarbone height may sit too high or dig in. Move it down an inch and test whether the shoulder straps stay put.
- Narrow shoulders: Shoulder straps slide outward. A slightly tighter sternum strap, set a bit lower, keeps them tracking straight.
- Plus-size hikers: Hip belts may need to sit slightly higher or lower than the textbook iliac crest position to find a spot where the padding wraps rather than digs. Re-check at every break, because soft tissue compresses and shifts over a long day.
Reading the Signals
Your body tells you which adjustment is wrong before you consciously notice it.
- Sore shoulders or numb hands: The hip belt has loosened and weight migrated up. Re-snug the hip belt first, then check the shoulder straps.
- Bruised collarbones: The sternum strap is too high or too tight, or the shoulder straps carry too much load.
- Lower back ache: The pack sits too low, or heavy items shifted away from your spine. Stop and repack, do not just tighten straps.
- Rubbing at the hips: The belt has ridden off the iliac crest. Reposition it before you tighten it.
- Pack swinging side to side: Compression straps have loosened. Re-tighten them before you touch the harness.
Common Mistakes to Avoid When Fitting a Backpacking Pack
Most fitting problems are not caused by the pack but by a handful of repeatable errors that show up across every body type. Here are the ones that matter most, with the mechanism behind each.
Mistake 1: Sizing by Height Instead of Torso Length
Your height tells you nothing about which pack size fits. Torso length, C7 vertebra to iliac crest, is the only measurement that matters. Two hikers the same height can need different sizes, and the wrong size means the hip belt lands in the wrong place no matter how hard you tighten it.
Mistake 2: Tightening Shoulder Straps First
This is the most common and most damaging error. Tightening shoulder straps before the hip belt pulls weight off your hips and onto your shoulders, the opposite of how a pack is designed to carry load. You will feel it within the first hour.
Mistake 3: Wearing the Hip Belt in the Wrong Place
The hip belt must sit on the iliac crest. Too high and it digs into your ribs; too low and it slides onto your thighs with every step. Both break load transfer, and both are easy to miss because the belt feels "tight" either way.
Mistake 4: Over-Tightening Load Lifters
Load lifters should sit at roughly 45 degrees and be snug, not taut. Over-tighten them and the pack pulls away from your back, creating instability on uneven ground; under-tighten them and the pack sags backward, loading your shoulders.
Mistake 5: Skipping the Sternum Strap
Without a sternum strap, shoulder straps slide outward and rub; set too tight, it restricts breathing. The sweet spot is collarbone height and snug enough to keep the straps in place without compressing your chest.
Mistake 6: Packing Heavy Gear at the Top
Heavy items belong in the middle of the pack, close to your spine. Put them at the top and your center of gravity shifts backward, forcing your shoulders to work harder with every step.
Mistake 7: Never Re-Adjusting on the Trail
Fit changes as the day goes on: sweat, layers, and terrain all shift where the load sits. Hikers who never touch their straps after the trailhead finish the day sore.
Mistake 8: Assuming One Fit Works for Every Body
This is the mistake most guides never mention. Frame geometry, hip belt shape, and shoulder strap curve are designed around a particular body archetype, and if you do not match it, the standard fitting sequence will not get you comfortable.
- Petite hikers often find load lifters bottom out before the pack is stable, because there is not enough torso length between the hip belt and the top of the frame. Look for packs with adjustable or shorter frame stays.
- Tall hikers frequently need longer load lifters and a taller frame to keep the pack from sagging. A pack that fits a 5'8" hiker may not have enough adjustment range for a 6'4" one.
- Broad-chested or broad-shouldered hikers may find a sternum strap at collarbone height sits too high. Moving it down an inch often solves rubbing that no amount of hip belt adjustment fixes.
- Narrow-shouldered hikers deal with the opposite problem: shoulder straps slide outward. A slightly tighter, lower sternum strap keeps them tracking.
- Plus-size hikers often need a hip belt that wraps rather than digs, which may mean positioning it slightly off the textbook iliac crest line to find a spot where the padding conforms. Re-check at every break, because soft tissue compresses over a long day.
Mistake 9: Buying Based on Volume Alone
For a pack that handles multi-day loads well, look for a model with a padded hip belt, load lifters, and a frame sheet. The REI expert advice on backpack fit covers similar ground and is a useful cross-check.
Frequently Asked Questions
How do I determine the correct torso length for a backpacking pack?
Measure from the C7 vertebra at the base of your neck down to the top of your iliac crest. Have someone help you with a flexible tape measure. Most adults fall between 16 and 22 inches. Once you have your torso length, match it to the pack's adjustable range. A properly fitted backpacking pack places the hip belt on your iliac crest and the shoulder straps flush against your back without gaps or pressure points.
How much weight should be on my hips versus my shoulders?
Aim for 80 to 90 percent of the load on your hips. The shoulder straps should carry only the remaining 10 to 20 percent, mostly to keep the pack stable. If your shoulders ache after a few miles, your hip belt is too loose or positioned too high. Tighten the hip belt, reposition it on your iliac crest, and use the load lifters to pull the pack close to your back.
What are the signs of an improperly fitted backpacking pack?
Common signs include shoulder pain, neck strain, hip belt slipping, the pack swaying side to side, and numbness in your arms. You may also notice red marks on your shoulders or hips at the end of the day. Any of these signals means you need to revisit your torso length measurement, hip belt adjustment, or weight distribution. A well-fitted pack should feel stable and comfortable for hours.
How do I adjust a backpack for a heavy multi-day load?
Start by loosening all straps, then load the pack with heavy items closest to your spine and centered between your shoulder blades. Fasten the hip belt first and tighten it snugly on your iliac crest. Tighten shoulder straps until they rest flat, then pull load lifters to about a 45-degree angle. Adjust the sternum strap across your chest and tighten compression straps to stabilize the load. Recheck after the first mile.
Getting the fit right takes practice, and the payoff is a trip where your gear disappears into the background. At AdventureTrailhead, we stock packs with padded hip belts, load lifters, and frame sheets designed for real load transfer, plus the outdoor apparel and footwear to match. Explore our hiking backpack collection, dial in your torso length, and hit the trail knowing your pack is working with you, not against you.