
Best Climbing Harness for Multi-Day Expeditions (2026 Guide)
Table of Contents
- Quick Comparison: Best Climbing Harness Options for Multi-Day Expeditions
- Big Wall Climbing Harness Features That Matter for Multi-Day Routes
- Climbing Harness Gear Loop Organization for Heavy Loads
- When to Replace a Climbing Harness Used on Expeditions
- Harness Fit and Sizing for Multi-Day Climbs
- Load Management and Layering Compatibility on Multi-Day Routes
- Conclusion
- Frequently Asked Questions
Last Updated: September 20, 2026
Quick Comparison: Best Climbing Harness Options for Multi-Day Expeditions
Choosing the best climbing harness for multi-day expeditions comes down to one question: can it keep you comfortable and secure after twelve hours on the wall, day after day? AdventureTrailhead's harnesses that hold up share four traits: dense padding, wide adjustment ranges, organized gear storage, and abrasion-resistant hardware.
Quick Picks:
- Best overall for heavy loads: Full Body Climbing Harness with Multi D Ring Support ($118.00), full-body coverage and multiple attachment points for rope work and hauling
- Best lightweight option: Outdoor Climbing Belt Safety Harness Gear Equipment ($104.83), lighter build for extended wear on moderate routes
- Best budget entry point: Outdoor Safety Belt Half Body Harness ($28.52), an affordable half-body harness for beginners and lighter objectives
| Harness | Price | Body Style | Best For |
|---|---|---|---|
| Full Body Climbing Harness with Multi D Ring Support | $118.00 | Full body | Heavy loads, rope access, hauling |
| Outdoor Climbing Belt Safety Harness | $104.83 | Belt-style | Extended wear, moderate routes |
| Outdoor Safety Belt Half Body Harness | $28.52 | Half body | Beginners, lighter objectives |
Big Wall Climbing Harness Features That Matter for Multi-Day Routes
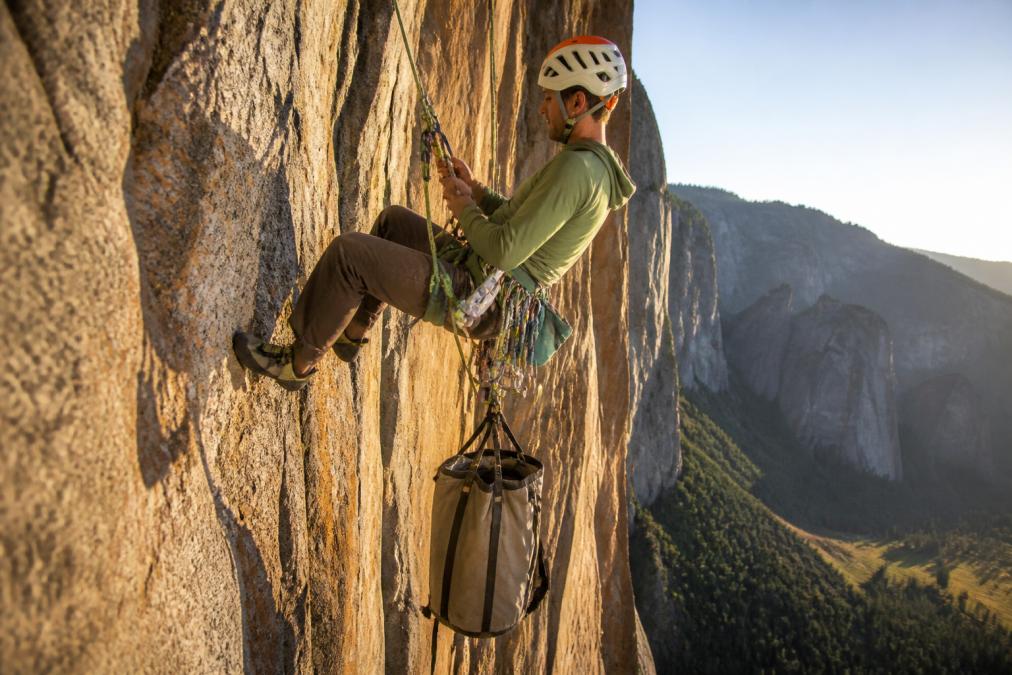
The features that separate a big wall climbing harness from a weekend cragging harness are padding density, adjustability, and load-bearing hardware. On a multi-day route you are hanging, jugging, and hauling for hours, not clipping and lowering in five minutes.

Padding Density and Suspension Comfort
Padding density determines how a harness feels after hour eight. Wider, denser padding spreads pressure across your hips and thighs instead of concentrating it on a few points. That matters most at hanging belays, where your full body weight rests on the waist belt and leg loops for long stretches.
Adjustability and Leg Loop Systems
Adjustable buckles on both the waist belt and leg loops let you fine-tune fit as layers change. On multi-day routes, you may start a pitch in a base layer and finish it in a puffy jacket. A harness that only adjusts at the waist will not accommodate that swing.
Climbing Harness Gear Loop Organization for Heavy Loads
Climbing harness gear loop organization keeps a heavy rack manageable when every piece counts. Four gear loops is the practical minimum for multi-day routes; six is better with a full trad rack plus aiders and ascenders.

- Front loops: Most-used items. Cams, nuts, and your belay device.
- Rear loops: Bulkier or less-frequent gear. Spare carabiners, cordelette, prusiks.
- Ice clipper slots: Dedicated slots for ice screws and tools on cold routes.
Ice Clipper Slots and Haul Loop Placement
Ice clipper slots sit at the hips and hold screws and tools ready for one-handed grabs, non-negotiable on alpine and mixed routes. A haul loop at the rear center is where you clip a tag line or haul system; check that it is rated and stitched into structural webbing, not just padding.
When to Replace a Climbing Harness Used on Expeditions
Replace a climbing harness when any load-bearing component shows wear: frayed webbing, cracked or bent buckles, damaged stitching, or a belay loop worn thin. On expedition use, inspect before every trip and retire the harness at the first sign of structural damage, expedition conditions age webbing far faster than gym use.
What Actually Degrades a Harness on a Multi-Day Route
Understanding the mechanisms tells you where to look:
- Grit abrasion. Granite dust and sand work into webbing and act like sandpaper against the fibers every time the harness flexes, the fastest wear factor on desert and alpine rock.
- UV exposure. Nylon and polyester webbing lose strength under prolonged sunlight; a harness left on a portaledge or clipped outside a pack for days accumulates invisible UV damage until the webbing fades and stiffens.
- Salt and moisture. Coastal and alpine routes expose webbing to salt spray, sweat, and freeze-thaw cycles. Salt crystals abrade fibers; repeated wetting and drying stiffens webbing and can mask internal damage.
- Chemical exposure. Sunscreen, insect repellent (especially DEET), and petroleum-based products degrade nylon and can soften or dissolve webbing coatings, a common, underappreciated cause of premature harness failure.
- Static load fatigue. Hours of hanging at belays and jugging fixed lines put sustained static load on the belay loop and waist belt, a different stress profile than a fall.
Inspection Points: Webbing, Buckles, and Stitching
Run this check after every multi-day trip, in good light, harness laid flat:
- Webbing: look for fraying, fuzzing, cuts, glazing (shiny, melted-looking spots), or chemical damage. Run your fingers along the waist belt and leg loop webbing, internal damage often shows as a soft or thin spot before a visible cut.
- Belay loop: check for thinning, glazing, or abrasion. It is the most heavily loaded single component and the first to show wear; noticeable thinning versus a new harness means retire.
- Buckles: confirm they lock, release cleanly, and show no cracks, bends, or corrosion.
- Stitching: inspect for pulled, broken, or fuzzy threads at load points, the belay loop attachment, haul loop, and waist belt structural stitching. A single broken bar tack at a load point is a retire signal.
- Leg loops and waist belt: check padding for compression and the structural webbing beneath. If the padding has flattened and the webbing is exposed to direct abrasion, the harness is past its useful life.
- Haul loop: confirm it is still stitched into structural webbing and not pulling away from padding.
Extending Service Life on Expedition Routes
A few habits extend harness life in high-exposure environments:
- Rinse webbing in fresh water after trips to remove salt and grit, then air-dry out of direct sun. Do not machine wash or use detergent.
- Store the harness hanging or loosely coiled, out of sunlight, away from solvents, gasoline, and battery acid.
- Keep sunscreen and DEET off the webbing where possible; apply before putting the harness on, and wipe hands before handling gear.
- Rotate between two harnesses on a long expedition season so neither accumulates continuous UV and grit exposure.
Harness Fit and Sizing for Multi-Day Climbs
Fit is the difference between a harness you forget about and one you resent by lunchtime. A well-fitted climbing harness sits snug but not tight, with the waist belt above your hip bones and the leg loops resting mid-thigh without pinching.
Full Body Climbing Harness with Multi D →
- Waist: measure around the widest part of your hips, not your natural waistline
- Thigh: measure around the fullest part of your upper thigh
Load Management and Layering Compatibility on Multi-Day Routes
Load management on multi-day routes comes down to two things: how the harness carries weight and how it works with your clothing system. A harness that digs in under a heavy rack or fights your layers will wear you down faster than the climbing itself, the part most harness guides skip, because they are written for gym and single-pitch climbers.
Carrying a Heavy Rack Without Hips That Ache by Day Two
A multi-day rack is not a sport rack. A typical big wall or alpine load includes a double set of cams, a full set of nuts, pitons, aiders, ascenders, a belay device, cordelette, prusiks, and a tag line, often 25 to 40 pounds of metal on your waist before a pack or haul bag. That weight pulls down and forward on the waist belt, which is why harness geometry matters more than padding thickness.
Three mechanisms do the actual work:
- Waist belt width and stiffness. A wider, stiffer waist belt spreads the downward pull across more of your iliac crest instead of concentrating it on the front two inches. Soft, thick foam feels plush in the store and flattens under a rack by mid-morning.
- Leg loop rise and angle. Leg loops that sit too low let the waist belt ride up under load; too high restricts hip flexion on steep ground. The rise length, the vertical distance from the bottom of the waist belt to the top of the leg loop, is the most overlooked load-bearing variable on multi-day routes.
- Rear haul loop integration. A rated haul loop stitched into structural webbing at the rear center is where a tag line or haul system attaches. If it is sewn only into padding, it will deform under load; check that the haul loop webbing runs continuously into the waist belt structure.
Layering Compatibility: Fitting a Harness Over Down and Shell Layers
This is the angle almost no harness guide addresses, and it decides whether a harness works on a cold expedition. On a multi-day route you may start a pitch in a base layer, add a mid layer at a shaded belay, and pull on a belay parka or down suit for a night ascent. Each layer adds roughly a quarter inch to an inch of effective circumference at the waist and thighs.
- Adjustable buckles on both the waist belt and the leg loops. Fixed leg loops save a few ounces and lose all layering flexibility. On expedition routes, adjustable leg loops are worth the weight.
- Generous webbing tail length. When you cinch down over a down suit, the buckle needs enough tail to thread cleanly. A harness sized at the top of its range in a base layer will not close over a parka.
- Low-profile buckles and padding that do not stack. Double-back buckles and bulky padding create pressure points when compressed under a pack hip belt or worn over a suit.
Planning the Rack Before You Leave the Ground
Multi-day load management also means planning your rack on the ground, not the wall. Weigh your gear, distribute it across loops so the front and rear carry roughly even weight, and test the setup on a short pitch before committing to a wall. A harness that twists under an unbalanced rack will chafe a hip raw by day three.
Conclusion
Multi-day climbing asks more of a harness than any single-pitch route ever will. Padding that holds its shape, adjustment that follows your layers, gear loops that keep a heavy rack organized, and hardware you can trust after years of abuse: those are the non-negotiables. Get them right and the harness disappears into the background, exactly where it belongs.
Frequently Asked Questions
What features make a climbing harness suitable for multi-day expeditions?
Multi-day expeditions demand a harness with thicker padding density for long hanging belays, at least four to six gear loops for racking on big walls, and a haul loop rated for load-bearing. Adjustable leg loops help with layering changes as temperatures shift. Ice clipper slots matter on alpine routes. The waist belt and leg loops should distribute weight across a wider surface area to reduce pressure points during hours of hanging.
How does a big wall harness differ from a standard sport climbing harness?
Big wall climbing harness features prioritize suspension comfort and gear capacity over minimal weight. A standard sport harness may have four small gear loops and thin padding; a big wall harness typically adds wider padding, more gear loops, ice clipper slots, and a reinforced haul loop. The rise length and harness geometry are tuned for sitting in a belay seat or hanging for hours rather than taking repeated falls.
How often should you replace a climbing harness used for expeditions?
On expeditions, UV exposure, abrasion against rock, and repeated loading accelerate wear. Inspect webbing for fraying, check buckles for cracks, and look for loose stitching before every trip. If any load-bearing component shows damage, replace the harness immediately.
Are adjustable leg loops necessary for multi-day climbing trips?
Adjustable leg loops let you loosen or tighten the harness as you add or remove layers. On multi-day routes where temperatures swing from warm approaches to freezing belays, this flexibility prevents restriction and improves circulation. Fixed leg loops save weight but limit fit adjustment. For expedition-ready use, adjustable buckles on the leg loops are worth the small weight penalty.
How should I organize gear loops on an expedition harness?
Climbing harness gear loop organization follows a consistent pattern: rack protection front to back on each side, keep the belay loop clear, and reserve rear loops for less-used items. Use the haul loop only for hauling, never for belaying. Ice clipper slots hold ice screws or tools. A predictable layout means you can find gear by feel in low light or when wearing gloves on technical terrain.