
How to Prevent Blisters While Hiking: Complete Guide
Table of Contents
- Why Blisters Form on the Trail
- Choosing the Right Footwear to Prevent Blisters
- Best Hiking Socks for Blister Prevention
- Preventing Hot Spots While Hiking
- Taping and Toe Protection Strategies
- How to Treat a Blister on a Hike
- Post-Hike Foot Recovery and Prevention for Your Next Trip
- Frequently Asked Questions
Last Updated: September 14, 2026
Why Blisters Form on the Trail
Learning how to prevent blisters while hiking starts with understanding why they happen. A blister is a fluid-filled sac that forms when repeated friction separates the epidermis from the dermis beneath it (Blisters: Causes, Treatment, Prevention).
The mechanics are simple. Your foot slides inside the boot, the skin shears against bone, and the layers separate. According to Cleveland Clinic's overview of blisters, moisture makes skin softer and more prone to this separation, which is why sweat and wet socks accelerate the problem.
Friction, Moisture, and Heat: The Blister Formula
Three ingredients cause nearly every trail blister: friction, moisture, and heat. Remove any one of them and the risk drops sharply.
- Friction comes from movement, especially heel slippage and toe box rub
- Moisture arrives as sweat or stream crossings, softening skin so it tears faster
- Heat swells your feet and increases sweat output, tightening the fit
Shearing force is the real culprit. Your foot moves forward, the boot holds, and the skin in between absorbs the stress. Stop the movement or stop the moisture, and you stop the blister.
Choosing the Right Footwear to Prevent Blisters
The single best way to prevent blisters is footwear that fits correctly. Most blisters trace back to boots that are too loose, too tight, or not broken in.
Fit matters more than brand or price. Aim for a thumb's width between your longest toe and the front of the boot, and make sure your heel stays locked when you walk. A proper break-in period of short walks before a big trip softens stiff leather and reveals pressure points early.
Fit, Break-In, and Lacing Techniques for Your Foot Shape
Lacing is the most underused tool in blister prevention. A heel lock, also called a runner's loop, anchors your ankle and stops heel slippage on steep descents.
- Narrow feet: use a surgeon's knot to cinch the midfoot
- Wide forefoot: skip the lowest eyelets to open the toe box
- High arches: lace loosely across the top, tighter near the ankle
For a dependable option, the Olive 6-Inch Waterproof Hiking Boots pair a suede leather upper with a VIBRAM® Traction Lug outsole, giving you grip and stability that reduces the micro-sliding behind most hot spots. The Men's Waterproof Hiking Boots add an anti-slip outsole and ankle-high support for wet or uneven terrain.


Best Hiking Socks for Blister Prevention
The best hiking socks for blister prevention manage moisture and reduce friction. Material choice does more for your feet than any single piece of gear, but "avoid cotton" is only the first sentence of the story. The fiber you choose changes how skin behaves across temperature ranges, and that is where most guides stop short.
Cotton holds sweat against the skin, which is the worst thing for a long climb. Merino wool and synthetic fibers pull moisture away and dry faster, keeping skin firmer and more resistant to shearing. Wicking properties matter as much as cushioning.
Sock Material Science: Merino vs. Synthetic by Condition
Merino wool and synthetics both wick, but they fail in different conditions. Understanding the trade-off lets you pick the right sock for the trip instead of owning one pair for everything.
- Merino wool: The fiber's crimped structure traps air and manages moisture vapor, so it stays warm even when damp. It resists odor naturally and feels soft against skin. The trade-off is durability, merino wears through faster at the heel and toe than synthetics, and it dries slower than a pure synthetic once fully saturated.
- Synthetics (polyester, nylon, olefin): These fibers move liquid water fast and dry quickly, which makes them the better choice in sustained wet conditions, stream crossings, monsoon-season trails, or multi-day trips where socks never fully dry. The trade-off is odor retention and a firmer hand-feel against skin.
- Blends: Most quality hiking socks combine merino for moisture management and comfort with nylon or spandex for durability and fit retention. A blend is usually the best all-around pick.
Match the fiber to the climate, not to a brand:
- Hot, arid conditions: A thinner synthetic or merino-synthetic blend dries fast and reduces bulk inside the boot, where heat and swelling already tighten the fit.
- Wet, humid conditions: Prioritize quick-drying synthetics and plan to swap socks at midday. A saturated merino sock becomes heavy and slow to dry.
- Cold, wet conditions: Merino's ability to insulate while damp makes it the safer choice, but pair it with a synthetic liner so the outer sock can be swapped without exposing skin.
Materials, Liners, and Why Two Layers Work
Liner socks are a thin base layer that absorbs friction so your skin doesn't have to. The two-layer system works because the liner and the outer sock slide against each other instead of against your foot, the shear force is redirected into the space between the two fabrics.
- Liner: thin, snug, synthetic or merino
- Outer: cushioned, breathable, wool or synthetic blend
- Avoid: cotton next to skin on multi-day trips
Cushioning placement matters as much as fiber. Look for terry-loop cushioning at the heel and ball of the foot, the two highest-shear zones, and a thinner knit across the instep so the sock doesn't bunch under laces. A sock that bunches creates a new friction point no material can fix.
Our Mens And Womens Hiking Breathable Sweat-absorbing Mid-calf Cotton Socks are built for breathability and sweat absorption on shorter day hikes. For long expeditions, pair them with a liner and swap socks at midday to keep feet dry.

Preventing Hot Spots While Hiking
Preventing hot spots while hiking comes down to one habit: stop the moment you feel warmth or a rub. A hot spot is a blister that hasn't formed yet, and it takes seconds to fix.
The mistake most hikers make is pushing through. By the time a hot spot becomes painful, the damage is done. Check your feet at every rest break, dry them, and address any pressure points before they turn into a fluid-filled sac.
How to Detect a Hot Spot Before It Hurts
A hot spot rarely announces itself as pain. The early signals are subtle, and learning to read them is the skill that separates hikers who finish with intact feet from those who don't.
- Warmth without pain: The first sign is a localized warm patch, often on the heel, the ball of the foot, or the top of a toe. If you notice it, stop.
- A "sticky" or grabbing sensation: Skin that feels like it's catching on the sock with each step is already shearing.
- A sock wrinkle or seam line: Run a hand inside the boot and along the sock. A ridge or fold marks a friction point that will become a blister within a mile or two.
- Tender, slightly pink skin: At a rest break, look for a reddened patch that feels sensitive to pressure. That is the blister forming beneath the surface.
Check your feet at every rest break, roughly every 60 to 90 minutes on a sustained climb, and immediately after any stream crossing or long descent. Descents are the highest-risk segment because heel slippage peaks when the foot slides forward against the boot.
Field Technique: Fixing a Hot Spot So It Stays Fixed
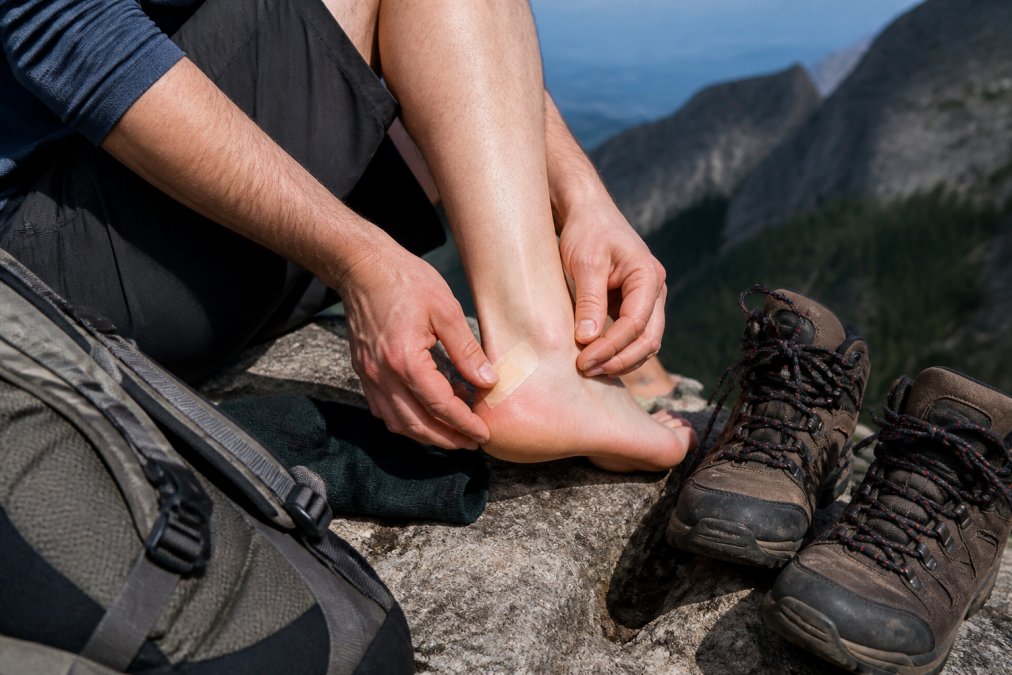
A hot spot fix only works if the skin is clean and dry before you apply anything. Trail dust, sweat, and sunscreen all prevent tape from bonding, and tape that peels within the first mile is worse than no tape because it bunches and creates a new friction point.
- Stop and sit. Take the boot and sock off the affected foot.
- Dry the skin completely. Use a clean bandana or gauze. Let it air for a minute if you can.
- Apply a barrier. Moleskin, a hydrocolloid blister patch, or Leukotape over the hot spot. Press firmly from the center outward to push out air bubbles.
- Round the edges. Trim corners so they don't catch on the sock.
- Re-sock and re-lace. If the hot spot was on the heel, add a heel lock to reduce slippage before you walk again.
If the same spot keeps flaring up despite tape, the problem is the fit, not the skin. A hot spot that returns after two fixes usually means the boot is too loose in the heel or too tight across the instep, adjust lacing or consider a different sock thickness before you keep taping the same spot.
Taping and Toe Protection Strategies
Taping is your first line of defense once friction starts. Adhesive tape, moleskin, and Leukotape create a barrier that absorbs shearing force before it reaches your skin.
Apply tape to clean, dry skin with no wrinkles. Moleskin works well for heel and arch protection, while Leukotape stays put through sweat and stream crossings. Gel toe protectors and caps shield toes that rub against each other or the toe box.
| Problem Area | Best Fix | Why It Works |
|---|---|---|
| Heel rub | Leukotape + heel lock lacing | Stops slippage and adds a friction barrier |
| Toe rub | Gel toe protectors | Cushions toe-to-toe contact |
| Arch hot spot | Moleskin | Absorbs shear on flat, high-friction zones |
| Wide toe box | Skip lowest eyelets | Reduces lateral pressure |
How to Treat a Blister on a Hike
Knowing how to treat a blister on a hike keeps a small problem from ending your trip. If a blister has already formed and is intact, leave it alone: the fluid inside is sterile and cushions the tissue beneath.
If it's painful and full, clean the area, sterilize a needle with antiseptic, and pierce the edge to drain it. Keep the roof of the skin intact, apply antiseptic, and cover with a blister pad. Never tear the skin away. For deeper guidance on wound care, the American Red Cross first aid resources cover safe blister and wound handling.
Post-Hike Foot Recovery and Prevention for Your Next Trip
Post-hike recovery is where most hikers leave performance on the table. Your feet swell and take a beating on the trail, and how you treat them afterward determines how they hold up next time.
- Wash and dry feet thoroughly, then check for hot spots you missed
- Let boots dry completely and inspect insoles for worn spots
- Moisturize callus formation areas, but keep skin between toes dry
- Rotate socks and boots so each pair fully dries between trips
Trail maintenance of your own feet is ongoing. Trim nails straight across, manage calluses, and replace worn insoles. This is the climate-proofing step: humid trips demand extra sock swaps, dry desert trips demand moisture management, and cold trips demand boots that don't over-compress.
Frequently Asked Questions
Should I put Vaseline on my feet before a hike?
Vaseline can reduce friction, but it also softens the skin and traps moisture, which may make blisters more likely. A better approach is to use a dedicated foot balm or powder that manages moisture without breaking down the skin. For most hikers, the real fix is well-fitting footwear and moisture-wicking socks. If you do use Vaseline, apply a thin layer and test it on a short walk first. Always carry blister patches in case a hot spot develops.
Why do I keep getting blisters when hiking?
Recurring blisters usually point to one of three problems: friction from a poor fit, moisture from sweat or water, or heat buildup. Check your boots for heel slippage and toe box crowding. Swap cotton socks for merino wool or synthetic blends that wick sweat. Also, consider your lacing: a heel lock can stop your foot from sliding. If you still get blisters in the same spot, try a liner sock or tape that area before you start.
Do two pairs of socks prevent blisters?
Yes, wearing a thin liner sock under a thicker hiking sock can reduce friction because the layers rub against each other instead of your skin. This setup also helps move moisture away from your feet. Look for a liner made of silk or synthetic material and a outer sock of merino wool. Just make sure your boots have enough room for the extra layer; if they feel tight, size up or use a thinner liner.
How do I know if a blister is forming?
The first sign is a hot spot: a warm, tender area that feels like a rubbing sensation. Stop immediately, take off your boot and sock, and check the skin. If it looks red and irritated, you have time to prevent a full blister. Clean the area, let it dry, and apply a blister patch or tape. If you wait until you feel sharp pain, a blister has already formed and treatment becomes more involved.
Blisters don't have to define your expedition. The right footwear, moisture-managing socks, and a fast response to hot spots keep you moving when the terrain turns rough. AdventureTrailhead stocks the footwear and gear to help you conquer peaks with confidence, from waterproof hiking boots with VIBRAM® traction to breathable, sweat-absorbing socks built for long days on the trail. Get started with AdventureTrailhead and gear up for your next adventure with total confidence.