
How to Clean Waterproof Camping Tents After a Trip
Table of Contents
- How to Clean a Tent After Camping: The Post-Trip Workflow
- Tent Cleaning Supplies: What to Use and What to Avoid
- How to Dry a Tent After Camping to Prevent Mildew
- Stain, Sap, Bird-Dropping, and Odor Removal
- How to Re-Waterproof a Tent: DWR Sprays and Seam Sealing
- Cleaning Specific Components: Rainfly, Tent Floor, and Mesh
- Storage and Inspection Checklist Between Trips
- Frequently Asked Questions
Last Updated: October 6, 2026
How to Clean a Tent After Camping: The Post-Trip Workflow
Learning how to clean waterproof camping tents after a trip comes down to one rule: deal with dirt and moisture before they sit.
Most of the work takes under half an hour. Skipping one step, usually drying, is what ruins tent fabric.
Step 1: Empty, Shake, and Inspect at the Trailhead
Start before you leave camp: empty every pocket, shake out debris, and check for damage in daylight.

Look for:
- Small holes or tears in the tent fabric
- Snapped or bent poles
- Worn stitches along seams
Step 2: Remove Dirt and Mud Without Scrubbing Harshly
Once home, lay the tent flat and brush off dry dirt first. For caked-on mud, rinse with warm water and mild soap, and do not scrub hard, gentle scrubbing protects the waterproof coating.
Tent Cleaning Supplies: What to Use and What to Avoid
The right tent cleaning supplies are simple: warm water, a soft cloth or sponge, and a gentle cleaner. Avoid harsh detergent, dish soap and laundry detergent strip the water-repellent treatment, and once that coating is gone your tent stops shedding rain.
What to use:
- Warm water
- A specialized cleaner or technical wash made for outdoor gear
- A soft-bristled brush for stubborn spots
What to avoid:
- Bleach or ammonia-based products
- Fabric softener
- Stiff brushes that abrade the coating
For canvas tents, the rules are the same but drying takes longer because canvas holds more water.
How to Dry a Tent After Camping to Prevent Mildew
Drying is the step most people rush and the one that matters most. A tent stored even slightly damp develops mildew within days, because mildew feeds on the oils, dirt, and body residue left in fabric. The goal is not "dry to the touch" but dry everywhere moisture hides. Set the tent up in a shaded, well-ventilated spot, sunlight breaks down waterproof coatings, so if shade is unavailable, dry in early morning or late afternoon light rather than midday sun.
The Component-by-Component Drying Checklist
Treat each part as its own drying job, these spots stay wet after the tent looks dry:
- Tent body: Open all doors, windows, and vents. Stake it loosely so air moves through the interior.
- Rainfly: Dry it separately, inside and out. The coated underside traps condensation against the tent body.
- Floor: Flip the tent or lift the floor edges. Corners and the bathtub seam collect water and are the most common mildew start point.
Give the setup several hours, typically 4 to 8 hours in good airflow, longer in humid conditions.
How to Dry a Tent in Damp or Rainy Weather
If you get home in the rain or live somewhere humid, use an indoor drying setup:
- Pick a room with airflow. A bathroom with an exhaust fan, a garage with the door cracked, or any room with a box fan works.
- Hang the tent body over a shower rod, two chairs, or a clothesline. Do not bunch it, spread the fabric so air reaches both sides.
- Point a fan directly at the tent. Moving air dries fabric far faster than still air. Aim it so air flows through the open doors and vents.
- Run a dehumidifier if you have one. It pulls the moisture the tent releases out of the air so the fabric keeps drying.
- Flip and rotate every couple of hours. The side against the rod or chair stays damp longest.
- Finish with a hand check. Press the seams, corners, and floor edges against your cheek or the back of your hand. Those areas feel cool and damp long after the surface feels dry.
Do not use a space heater or hair dryer. Concentrated heat can melt or crack the waterproof coating and weaken seam tape.
Air Drying vs. Machine Drying: Why One Works and One Ruins Fabric
Air drying is the only safe method. Never put a camping tent in a dryer, machine heat melts and cracks the waterproof coating, shrinks fabric, and weakens stitches. One cycle can destroy a tent.
Stain, Sap, Bird-Dropping, and Odor Removal
Most stains come out with warm water and a gentle cleaner if you treat them fast.
- Tree sap: Dab with a small amount of isopropyl alcohol on a cloth, then rinse well.
- Bird droppings: Soak with warm water, then wipe gently. Do not scrub dried droppings into the fabric.
- Mud stains: Let them dry, brush off, then wash with mild soap.
Never use a pressure washer. The force pushes water through the waterproof coating and damages seams.
How to Re-Waterproof a Tent: DWR Sprays and Seam Sealing
Waterproofing a tent is two separate systems that fail in different ways. The DWR (durable water repellent) finish makes water bead and roll off the face fabric. Seam tape and seam sealant keep water from pushing through stitch holes. Cleaning restores neither, know which one has worn out before you treat anything.
First, Decide Whether You Actually Need to Re-Waterproof
Do not spray a tent that does not need it, extra DWR layers leave a sticky residue that attracts dirt. Run this test once the tent is clean and fully dry:
- The bead test. Spray the tent with a hose or spray bottle. If water beads into round droplets and rolls off, the DWR is fine, stop here.
- The wet-out test. If water spreads into flat patches and darkens the fabric instead of beading, the DWR has worn off there, reapply.
- The inside test. If the fabric beads outside but you feel moisture inside the tent wall, that is condensation, not a leak. Re-waterproofing will not fix it.
- The seam test. Check the inside of every seam. If the factory tape is peeling, cracked, or missing, you need seam sealing regardless of the DWR.
- The puddle test. If water pools on the floor and seeps through at the corners or bathtub seam, that is a seam or floor-coating issue, not DWR.
DWR wears out first on high-abuse areas: the floor, the rainfly, and the shoulders where packs and bodies rub. Spot-treat those instead of spraying the whole tent.
How to Reapply DWR
- Clean and fully dry the tent first. Spray will not bond to a dirty or damp surface, and detergent residue prevents curing.
- Set the tent up outside or in a well-ventilated space. DWR sprays need airflow.
- Apply evenly across the outer fabric. Hold the can at the label's recommended distance, use overlapping passes, and focus on the floor and rainfly.
- Let it cure per the product directions. Most spray-on DWR needs to dry fully before packing or rain.
- Heat-set only if the label says to. Some products cure better with a low tumble-dry or warm iron on low, follow the instructions, never guess.
How to Reseal Seams
Seam sealing is a separate job from DWR and uses a seam sealant, not a spray.
- Set the tent up and find every seam. Include rainfly seams, the floor bathtub seam, and seams around vents or pole sleeves.
- Clean the seam area. Wipe off dirt and old flaking tape with a damp cloth and let it dry.
- Apply sealant along the inside of the seam. Most sealants go on the interior face where the stitching is, follow the product's directions.
- Work in thin, even layers. Thick blobs cure slowly and can peel.
- Let it cure fully before folding or packing. Cure time varies by product and humidity, check the label.
After Treatment: Run a Water Test
Once the DWR and seam sealant have cured, set the tent up and spray it with a hose. Watch where water beads and where it soaks in, then re-treat any patch that wets out, especially the floor and rainfly.
Cleaning Specific Components: Rainfly, Tent Floor, and Mesh
Each part of a waterproof camping tent needs slightly different care.
| Component | Cleaning method | Watch out for |
|---|---|---|
| Rainfly | Hand wash with mild soap, air dry | Coating damage from harsh detergent |
| Tent floor | Wipe with damp cloth, dry fully | Trapped moisture at the corners |
| Mesh panels | Rinse gently, never scrub | Tears from stiff brushes |
| Seams and stitches | Inspect, reseal when needed | Peeling seam tape |
| Poles and stakes | Wipe clean, check for bends | Rust and bent tips |
The rainfly takes the most abuse, so inspect it every time. The floor collects the most dirt, and mesh is the most fragile, use only a soft cloth and light pressure.
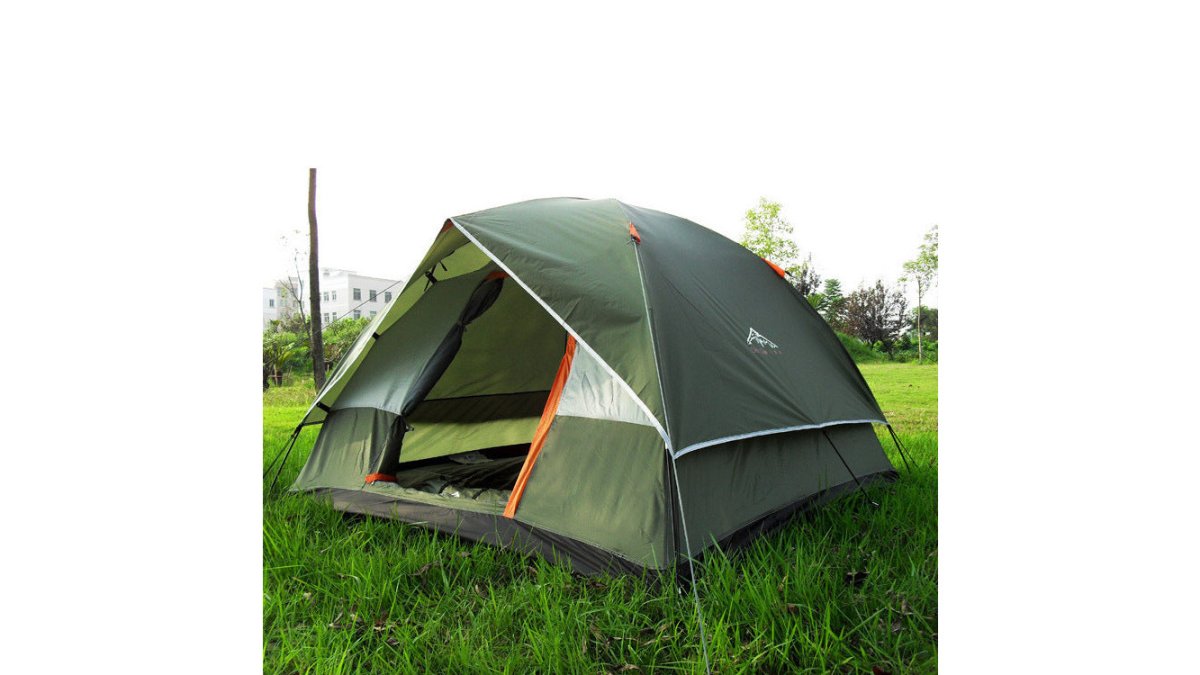
Our Waterproof Camping Tent uses a 210T rubberized outer with a 2500mm-3000mm waterproof rating and a PU-coated Oxford floor, so it handles a proper wash without losing its weather protection.
Storage and Inspection Checklist Between Trips
Store your tent loose, dry, and out of the sun. Never leave it compressed in its stuff sack for months, folds create weak points in the coating. Use this checklist between trips:
- Tent is completely dry inside and out
- No mildew spots or musty odor
- Seams inspected and resealed if needed
- Waterproofing spray applied if water no longer beads
A little maintenance between trips adds years to the gear. For backpackers who want something lighter, our Trekker Tent 1 packs down to just 2 pounds 13 ounces and cleans up the same way.
Waterproof fabric care decides whether your tent survives another season. Skip the drying step once and you will smell it for years.
At AdventureTrailhead, we stock gear built for real trips: waterproof tents with proven coatings, lightweight backpacking shelters, and the storage and care basics that keep them working. Our Pop-up Camping Tent and Camping Tent options cover everything from quick weekend setups to multi-day base camps.


Get started with AdventureTrailhead and head into your next trip knowing your shelter is clean, dry, and ready for weather.
Frequently Asked Questions
How do you clean a tent after a trip?
Set the tent up or lay it flat, shake out loose dirt, then wipe the fabric with a soft cloth and warm water mixed with a mild technical cleaner. Rinse thoroughly and air dry completely before packing. For waterproof camping tents, avoid harsh detergents and never machine wash, since agitation breaks down the waterproof coating and seam seal.
Can I use Dawn dish soap to wash my tent?
Dish soap strips the water-repellent treatment from tent fabric and can leave residue that attracts moisture. Use a specialized cleaner or a very mild soap instead. If you must use something on hand, dilute it heavily and rinse several times, but a technical wash is safer for the waterproof coating on a camping tent.
Can you put a waterproof camping tent in a washing machine?
No. Washing machines twist and agitate fabric, which cracks waterproof coatings, pulls seams, and damages mesh panels. Hand wash waterproof camping tents in a bathtub or large basin with warm water and a gentle cleaner, then air dry. Machine washing voids most tent warranties and shortens the life of the fabric.
How do I make my tent waterproof again?
First clean and dry the tent completely. Then check the seams and apply seam sealant where stitching looks worn. Spray a waterproofing spray or DWR treatment evenly across the rainfly and tent body, let it cure per the product instructions, and run a water test.