
Essential Climbing Knots for Beginners: 2026 Guide
Table of Contents
- Why These Climbing Knots Matter Before You Leave the Ground
- The 8 Essential Climbing Knots for Beginners to Learn
- How to Tie a Figure Eight Follow Through
- How Long Do Climbing Ropes Last?
- Climbing Gear Maintenance Guide: Knots and Rope Care
- Knot Failure Analysis and One-Handed Tying Techniques
- Conclusion
- Frequently Asked Questions
Last Updated: September 23, 2026
Why These Climbing Knots Matter Before You Leave the Ground
Every year, rescue teams respond to climbing accidents caused by one fixable problem: a knot that was tied wrong, dressed poorly, or never checked. According to the American Alpine Club's annual accident reports, human error in knot tying and belay setup remains one of the most common factors in preventable climbing incidents.
The 8 Essential Climbing Knots for Beginners to Learn
These eight knots cover tying into a harness, building an anchor, belaying, and self-rescue. Practice each until you can tie it without looking at your hands.
| Knot | Main Use | Tied On | Key Inspection Cue |
|---|---|---|---|
| Figure-Eight Follow-Through | Tie into harness | Dynamic rope | Strands parallel, no crosses, 6 in. tail |
| Figure-Eight on a Bight | Clip-in point | Dynamic rope | Loop dressed, tail at least 6 in. |
| Clove Hitch | Anchor attachment | Rope or sling | Two opposing turns, snug against carabiner |
| Munter Hitch | Belay/rappel backup | Carabiner | Hitch flips freely, no twists in the brake strand |
| Prusik Knot | Friction hitch, self-rescue | Cordage | Wraps lie flat, no overlap, grips when weighted |
| Water Knot (Ring Bend) | Join webbing | Webbing | 3 in. tails, knot flat, no rolled edges |
| Double Fisherman's Knot | Join two ropes | Cordage | Two barrel knots seated against each other |
| Alpine Butterfly Knot | Mid-rope clip-in | Dynamic rope | Loop sits straight, no crossed strands |
Figure-Eight Follow-Through
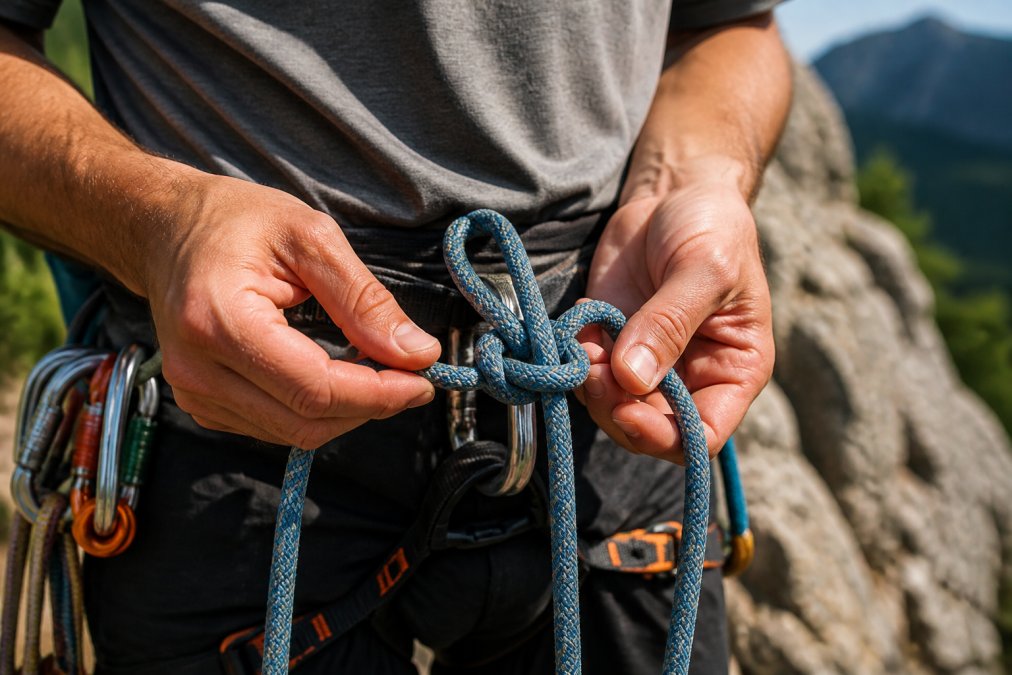
The Figure-Eight Follow-Through is the standard knot for tying into your harness: strong, easy to inspect, and secure under load. Tie a figure-eight, pass the working end through your harness tie-in points, then retrace the original path. Dress it so every strand lies parallel, and leave at least six inches of tail.
Figure-Eight on a Bight
A Figure-Eight on a Bight creates a fixed loop in the middle of a rope, used to build anchors or clip into a belay station. Fold a section of rope into a bight, tie a figure eight with the doubled strand, and dress the loop flat.
Clove Hitch
The Clove Hitch attaches a rope to a carabiner or anchor point and adjusts easily, making it useful for anchor building and equalizing a belay station. Tie two opposing turns around the carabiner, tuck the working end under the second turn, add a stopper knot, and snug it so it cannot creep.
Munter Hitch
The Munter Hitch is a friction hitch that works as a belay or rappel backup and flips direction under load without re-rigging. It needs a large, pear-shaped locking carabiner so the hitch can flip freely. Keep the brake strand clear of twists and never let the hitch bind against the gate.
Prusik Knot
A Prusik Knot is a friction hitch tied with cordage around a thicker rope: it grips when weighted and slides when unweighted, and is used for self-rescue and ascending. Wrap the cord two to three times around the main rope, pass the loop through itself, and dress the wraps flat without overlapping.
Water Knot (Ring Bend)
The Water Knot, also called the Ring Bend, joins two ends of webbing and is the standard knot for slings and anchor material. Tie a loose overhand in one end, then retrace it with the other end. Leave at least three inches of tail on each side, check that the webbing lies flat rather than rolled, and retie it periodically, because webbing knots work loose.
Double Fisherman's Knot
The Double Fisherman's Knot joins two ropes or cordage of similar diameter: two barrel knots pull against each other to lock the join. It is very secure but can jam after heavy loading, so use it for cordelettes and Prusik loops rather than a rope you plan to untie at the anchor.
Alpine Butterfly Knot
The Alpine Butterfly Knot creates a fixed loop in the middle of a rope, handles load from either direction, and stays easy to untie after heavy loading. Use it to isolate a damaged section of rope or clip in a middle climber on a glacier or multi-pitch route. Dress the loop straight, with no crossed strands.
Which Knot for Which Discipline
The right knot depends on how you climb.
- Sport climbing: Figure eight follow-through for tying in, figure eight on a bight for clipping into an anchor, Munter hitch as a backup belay. You rarely need a Prusik on a single-pitch sport route.
- Trad climbing: Add the clove hitch for anchor attachment, the Alpine Butterfly for isolating a damaged section of rope, and the Prusik for self-rescue. The double fisherman's knot is standard for cordelettes.
- Multi-pitch and rappelling: The Munter hitch and Prusik become safety-critical, and the water knot matters for webbing slings. Know how to tie a Prusik one-handed before you rappel.
How to Tie a Figure Eight Follow Through
The figure eight follow through is the first knot most instructors teach. Here is the step-by-step process.
Total Time: 2 minutes Difficulty: Beginner
What You'll Need:
- A dynamic climbing rope
- A climbing harness
- A partner to check your knot
- Make a figure eight. Measure about an arm's length of tail. Form a loop, then wrap the working end around the standing end and back through the loop.
- Pass the tail through your harness. Thread the working end through both tie-in points on your harness.
- Retrace the figure eight. Follow the original knot back through, keeping the strands parallel.
- Dress the knot. Remove any crosses and make sure every strand lies flat.
- Set the knot. Pull each strand firmly so the knot tightens.
- Leave a tail. Keep at least six inches of tail past the knot.
- Partner check. Have your partner inspect the knot before you climb.
How to Tie a Figure Eight Follow Through
The figure eight follow through is the first knot most instructors teach. Here is the step-by-step process.
Total Time: 2 minutes Difficulty: Beginner
What You'll Need:
- A dynamic climbing rope
- A climbing harness
- A partner to check your knot
- Make a figure eight. Measure about an arm's length of tail. Form a loop, then wrap the working end around the standing end and back through the loop.
- Pass the tail through your harness. Thread the working end through both tie-in points on your harness.
- Retrace the figure eight. Follow the original knot back through, keeping the strands parallel.
- Dress the knot. Remove any crosses and make sure every strand lies flat.
- Set the knot. Pull each strand firmly so the knot tightens.
- Leave a tail. Keep at least six inches of tail past the knot.
- Partner check. Have your partner inspect the knot before you climb.
How Long Do Climbing Ropes Last?
Most climbing ropes last three to five years with regular use, but the real answer depends on how often you climb and how you store the rope.
Watch for these retirement signs:
- Flat or stiff spots along the sheath
- Cuts, glazing, or fuzzy patches
- Core shots where the sheath is cut through
- Damage from chemicals or excessive heat
Climbing Gear Maintenance Guide: Knots and Rope Care
Proper care keeps your knots reliable and your rope strong.
- Inspect before every climb. Run the rope through your hands and feel for damage.
- Clean your rope. Wash it in cool water with mild soap, then air dry it out of direct sun.
- Store it right. Keep rope and cordage away from sunlight, chemicals, and sharp edges.
- Retire cordage on schedule. Prusik cords and slings wear faster than your main rope.
- Check your knots. Retie any knot that looks loose or poorly dressed.
Knot Failure Analysis and One-Handed Tying Techniques
Most knot failures come down to three causes: an improperly dressed knot, a missing stopper knot, or a knot that was never checked. Knowing what each failure looks like before it happens is the difference between a knot that holds and one that does not.
Visual Indicators of a Poorly Dressed Knot
A poorly dressed knot leaves visual clues. Learn to spot these before you leave the ground:
- Crossed strands. In a figure eight follow-through, the two strands should run parallel through every turn. A cross means the knot is not dressed and can reduce strength.
- A short tail. Six inches is the working minimum for a figure eight follow-through; a shorter tail can slip under cyclic loading.
- A rolled water knot. Webbing should lie flat through the ring bend. Rolled or twisted webbing means the knot is not seated and can work loose.
- A loose clove hitch. The two turns should sit snug against the carabiner. If you can slide the hitch with light pressure, it is not set.
- An overlapping Prusik. Wraps should lie flat and side by side; overlapping wraps reduce grip and can slip under load.
Common Mistakes That Lead to Slippage
- Tying the wrong knot for the material. A water knot belongs on webbing, not rope. A double fisherman's knot belongs on cordage of similar diameter, not on two ropes of very different sizes.
- Skipping the stopper knot. A clove hitch without a stopper knot can creep; a Munter hitch without a properly sized carabiner can bind.
- Never setting the knot. A knot tied but not firmly set can work loose as the rope cycles under load. Pull every strand firmly before you climb.
- Skipping the partner check. The most common pattern in preventable incidents is a knot never checked by a second set of eyes.
Knot Maintenance and Retirement
Rope wear affects knot integrity. A knot tied in a stiff, glazed, or flattened section of rope does not dress the same way as one tied in fresh rope, and it is harder to inspect. Retire cordage and slings on a schedule, and inspect Prusik loops and cordelettes more often than your main rope.
One-Handed Tying Techniques
One-handed tying matters when you are injured, hanging on a wall, or holding position with one hand. Practice these two skills before you need them:
- One-handed clove hitch. Hold the carabiner with your anchor hand, form a loop in the rope with your free hand, and rotate the loop twice around the carabiner. This is the fastest way to attach yourself to an anchor with one hand.
- One-handed figure eight on a bight. Fold a bight of rope, form the figure eight with your free hand, and dress it against your harness or a carabiner. This gives you a clip-in point when you cannot use both hands.
Conclusion
Learning essential climbing knots takes practice, and the stakes are real. Start with the figure eight follow through, build your skills one knot at a time, check every knot before you climb, and retire worn gear without hesitation.
Frequently Asked Questions
What are the 8 basic knots for beginners?
The eight essential climbing knots are the Figure-Eight Follow-Through, Figure-Eight on a Bight, Clove Hitch, Munter Hitch, Prusik Knot, Water Knot, Double Fisherman's Knot, and Alpine Butterfly. Each serves a specific purpose, from tying into your harness to building anchors and self-rescue. Start by practicing the Figure-Eight Follow-Through, then add the others as you gain confidence.
How often should beginners practice tying climbing knots?
Aim for short, frequent sessions, around 10-15 minutes several times a week, until each knot becomes muscle memory. Practice with your eyes closed and while wearing gloves to simulate real conditions. Consistency matters more than long marathons; regular repetition builds the speed and accuracy you need when you're cold, tired, or wearing a headlamp on a multi-pitch route.
What is the difference between a hitch, a bend, and a knot?
A hitch attaches a rope to an object, like a carabiner or tree, such as the Clove Hitch. A bend joins two ropes together, like the Double Fisherman's Knot or Water Knot. A knot is a general term for any rope configuration, but in climbing, it often refers to a loop or tie-in knot like the Figure-Eight Follow-Through. Knowing these distinctions helps you choose the right tool for the task.
Are there specific knots required for rappelling?
Yes. For rappelling, you need a friction hitch like the Prusik Knot to back up your belay device, plus a knot to join ropes if you're doing a double-rope rappel, such as the Double Fisherman's Knot. The Figure-Eight on a Bight is also used to create a secure attachment point. Always check your rappel setup and confirm your knots are dressed and set before committing.