
Best Beginner Mountaineering Gear 2026
Table of Contents
- Beginner Mountaineering Gear: Quick Comparison Table
- Mountaineering Gear Checklist for Beginners
- How to Choose Mountaineering Boots for Beginners
- Mountaineering Safety Gear Requirements Every Beginner Must Know
- Rent or Buy? A Budget-Conscious Beginner's Guide
- Technical Apparel and Layering Systems for Alpine Starts
- Gear Longevity: Making Your Investment Last
- Conclusion
Last Updated: August 16, 2026
Planning your first technical mountaineering objective is exciting, then you open a gear guide and realize you're staring down a list that could cost as much as a used car. This guide breaks down the best beginner mountaineering gear for 2026, covering everything from crampon-compatible boots to layering systems, plus a frank look at what you should rent versus buy.
The core tension in beginner mountaineering gear is this: buy too cheap and your equipment fails you on technical terrain; buy too expensive and you've invested in gear you may outgrow or never fully use.
Beginner Mountaineering Gear: Quick Comparison Table
Beginner mountaineering gear is the collection of footwear, protection, load-carrying, and technical tools required to safely travel on glaciated or high-alpine terrain. The table below summarizes the essential categories, what to look for, and realistic price ranges for quality entry-level options.
| Gear Category | Key Spec to Check | Entry-Level Price Range | Rent or Buy? |
|---|---|---|---|
| Mountaineering Boots | B2/B3 rating, crampon compatibility | $200 - $400 | Buy |
| Crampons | C2 frame, anti-balling plates | $80 - $200 | Rent first |
| Ice Axe | 60-70 cm general mountaineering axe | $60 - $150 | Rent first |
| Climbing Helmet | UIAA or CE EN 12492 certified | $60 - $130 | Buy |
| Alpine Harness | Adjustable leg loops, gear loops | $70 - $150 | Buy |
| Dynamic Rope (single) | 9.5-10.2 mm, 60 m | $150 - $250 | Rent first |
| Pack (40-55L) | Load distribution, hip belt | $100 - $250 | Buy |
| Layering System | Base, mid, storm shell | $150 - $400 | Buy |
| Headlamp | 300+ lumens, rechargeable | $50 - $120 | Buy |
| Trekking Poles | Adjustable, aluminum or carbon | $30 - $100 | Buy |
American Alpine Club gear and safety resources

Mountaineering Gear Checklist for Beginners
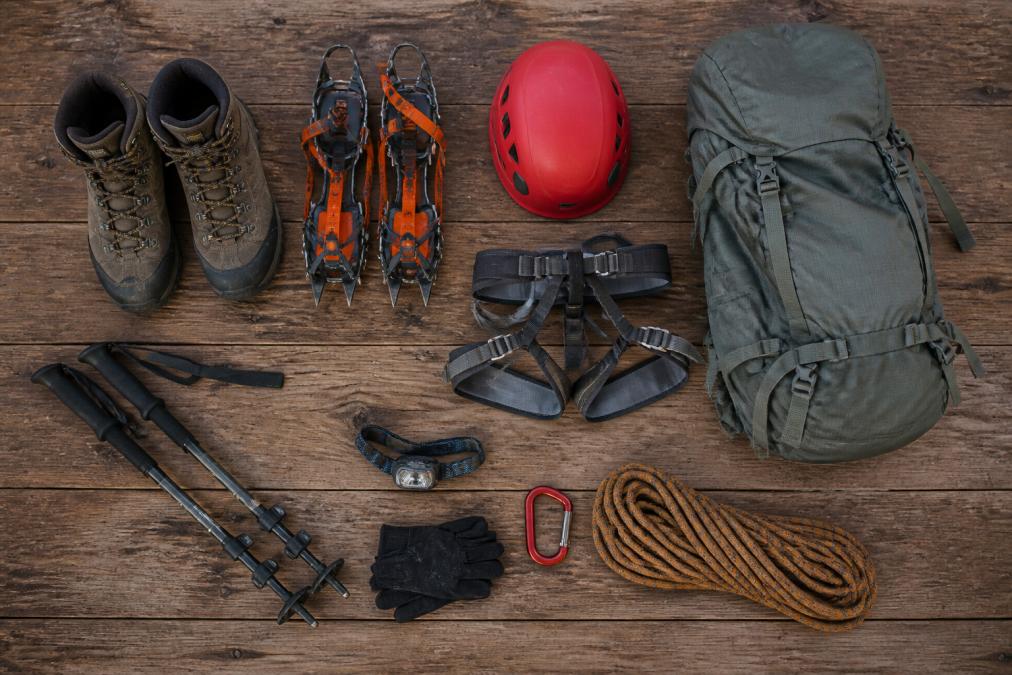
A solid mountaineering gear checklist divides the kit into four functional zones: footwear and traction, protection and safety, load carrying and shelter, and technical tools. Miss one zone and your objective becomes genuinely dangerous.
Footwear and Traction Devices
Your boots are the single most consequential purchase in the entire kit. For beginner mountaineering, you need a B2 or B3 rated boot, stiff enough to accept step-in or semi-automatic crampons and hold an edge on hard snow. A trail runner or standard hiking boot won't work on glacier travel or sustained steep snow.
Crampon compatibility is non-negotiable. Before buying crampons, confirm they match your boot's welt profile. C1 flexible crampons work with softer boots; C2 rigid frames require a B2/B3 boot. Mixing incompatible systems is a safety issue, not just an inconvenience.
For approach terrain below the technical objective, the Men's Outdoor High-top Breathable Hiking Boots at $78.25 feature a rubber lug outsole, EVA midsole cushioning, and high-top support, a practical choice for trail miles before switching into technical footwear at the snowline.

Traction devices for non-technical snow (microspikes or lightweight instep crampons) are worth carrying on any route with icy approach trails.
Protective Gear: Helmets, Harnesses, and Ropes
Climbing helmets are mandatory on any route with rockfall or technical terrain. Look for UIAA or CE EN 12492 certification. For alpine mountaineering, a vented hybrid foam-and-shell design balances breathability with protection.
An alpine harness differs from a sport climbing harness in one critical way: adjustable leg loops. On an alpine start at 3 a.m. in sub-freezing temperatures, you're putting on a harness over multiple insulation layers. Fixed leg loops won't fit. Prioritize harness fit across different clothing thicknesses before purchasing.
A dynamic single rope (9.5-10.2 mm, 60 m) handles glacier travel and technical pitches. Static ropes are for fixed lines and hauling, not for leading or catching falls. Beginners roping up on a glacier need a dynamic rope. A belay device (tube-style or assisted-braking) rounds out the protection system.
Safety standards for climbing equipment in the United States are governed by the UIAA safety standards for climbing equipment, and any helmet, harness, or rope you buy should carry those certifications visibly on the product label.
Packs, Shelter, and Sleep Systems
Pack volume for a single-day alpine objective sits around 30-40L; for multi-day routes, 50-65L. Load distribution matters more than raw volume. A three-point system, back panel, shoulder straps, and hip belt, keeps weight centered over your hips and reduces fatigue on long approaches.
The Large-capacity Hiking Backpack, 30-35L at $75.99 uses a roll-top closure that adjusts from 30L to 35L, multi-layered 200D nylon for waterproof and tear-resistant performance, and a three-point load distribution system. At 0.95 kg, it's lightweight for day objectives.
For overnight objectives, the Camping Sleeping Bag Lightweight Warm & Cold Envelope Backpacking Sleeping Bag at $97.00 covers comfort temperatures down to around 0-5°C in its winter configuration. Pair it with the Ultra-Light Inflatable Sleeping Pad with Built-in Pillow at $49.99, which provides meaningful insulation from cold ground.

Technical Tools and Navigation Aids
An ice axe is the defining tool of technical mountaineering. For beginners on moderate snow routes (up to 45 degrees), a general mountaineering axe in the 60-70 cm range handles glacier travel, self-arrest, and step-cutting. Practice ice axe self-arrest before you need it.
Headlamps are non-negotiable for alpine starts. The Rechargeable LED Headlamp 1600 Lumens at $99.95 delivers up to 1600 lumens with a rechargeable battery, enough output to navigate technical terrain in the dark. Carry a spare battery or backup light on any route where you're moving before dawn.
For navigation, a map and compass remain the reliable baseline. GPS devices and phone apps supplement but don't replace analog navigation skills. The Travel Folding Walking & Hiking Poles at $64.99 fold to 13.5 inches, weigh under 1.5 lbs per pair, and include snow baskets and tungsten steel tips.
How to Choose Mountaineering Boots for Beginners
The right mountaineering boots for beginners are B2-rated, crampon-compatible, and sized with enough room for thick wool socks without compressing the toes. Boot selection is where most beginners make their most expensive mistake.
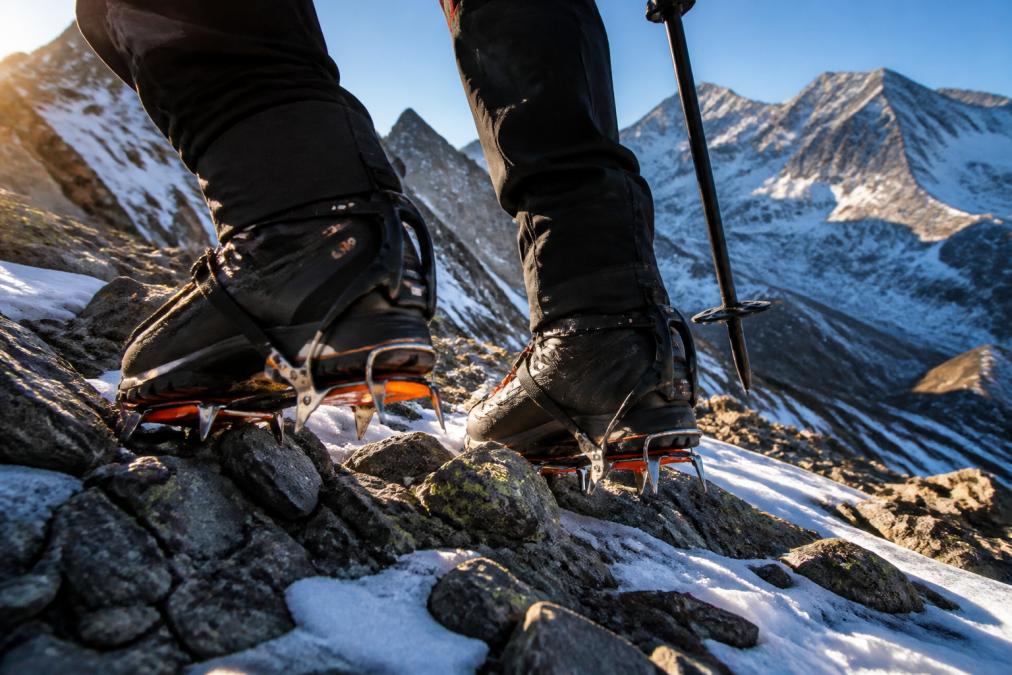
Step 1: Identify your objective terrain. Snow and glacier routes up to moderate angles (under 50 degrees) call for a B2 boot. Technical ice or mixed routes require a B3. Most beginners start on B2 terrain.
Step 2: Check crampon compatibility before buying either item. Bring your boots to the shop and physically fit the crampons to them. C2 frame crampons require a defined welt; C1 flexible crampons are more forgiving.
Step 3: Size for thick socks and toe room. Your toes should not touch the front of the boot when you kick your heel back. Cramped toes lose circulation fast in cold conditions.
Step 4: Test stiffness. Hold the boot at the toe and heel and try to flex it. A B2 boot should resist significantly. If it bends easily, it's a hiking boot, not a mountaineering boot.
Step 5: Consider a waterproof breathable membrane. A waterproof breathable membrane liner keeps feet dry on wet snow approaches and prevents the soaking that leads to blisters and cold injuries.
Mountaineering Safety Gear Requirements Every Beginner Must Know
Mountaineering safety gear requirements exist because the consequences of failure on technical terrain are severe. Every beginner must understand the minimum safety system before leaving the trailhead.
The non-negotiable safety kit for any roped objective:
- Helmet: UIAA or CE EN 12492 certified. Rockfall and ice fall are unpredictable.
- Harness: Adjustable leg loops, minimum 3 gear loops. Fit it over your full insulation layer.
- Dynamic rope: Single dry-treated rope, 9.5-10.2 mm, minimum 50 m for most alpine routes.
- Belay device: Tube-style (ATC-type) as baseline; assisted-braking devices add margin for tired belayers.
- Locking carabiners: Minimum 3 per person for glacier travel anchors.
- Ice axe: General mountaineering axe for any route with snow steeper than 30 degrees.
- Crampons: C2 frame with anti-balling plates for glacier travel and hard snow.
- Crevasse rescue kit: Two prussik cords, a pulley, and the knowledge to use them.
Owning safety gear isn't enough. A harness in your pack won't help if you don't know how to build an anchor. The Leave No Trace Center for Outdoor Ethics safety and skills resources and the American Alpine Club both offer skills courses specifically for beginners that cover self-arrest, crampon technique, and crevasse rescue before you commit to a real objective.
Rent or Buy? A Budget-Conscious Beginner's Guide
The most common mistake beginners make is buying every piece of gear before they know whether they'll love the sport. Some gear, especially technical tools, is worth renting until you're certain of your direction.
Rent these first:
- Ice axes (until you know your preferred axe length and style)
- Crampons (until you've confirmed your boot compatibility and preferred crampon type)
- Ropes (guide services typically provide these on guided objectives)
- Belay devices (bundled with rope rentals at most guide services)
Buy these from the start:
- Boots (fit is too personal to rent effectively, and boot-transmitted infections are a real concern)
- Helmet (hygiene, and a properly fitting helmet is critical for protection)
- Harness (same hygiene and fit rationale as helmets)
- Layering system (body-specific fit and your personal temperature regulation needs)
- Headlamp (personal safety item; a dead rental battery is your problem at 3 a.m.)
- Pack (fit is personal and affects your entire day)
| Item | Rent | Buy | Reason |
|---|---|---|---|
| Ice Axe | First 2-3 trips | After 3+ objectives | Style preference develops with experience |
| Crampons | First 1-2 trips | Once boots are confirmed | Compatibility is boot-specific |
| Rope | Guided trips | When leading independently | Guide services include ropes |
| Boots | Never | Immediately | Fit and hygiene |
| Helmet | Avoid | Immediately | Fit and hygiene |
| Harness | Avoid | Immediately | Fit critical for safety |
| Headlamp | Never | Immediately | Battery reliability is personal |
The Hydration Pack Backpack (Medium) at $44.99 is a smart early purchase for approach days. The included 2L BPA-free bladder and breathable mesh back panel make it functional for day-use before you invest in a full mountaineering pack.
Technical Apparel and Layering Systems for Alpine Starts
What separates a competent alpinist from a miserable one at 4 a.m. is almost always the layering system. Technical apparel for mountaineering follows a three-layer logic: moisture management at the skin, insulation in the middle, and weather protection on the outside.
Base layer: Merino wool or synthetic moisture management fabrics keep sweat off your skin during high-output approach sections. Cotton is genuinely dangerous in alpine conditions; it retains moisture and accelerates heat loss.
Mid layer: Softshell layering or insulated mid-layers depending on the objective temperature. A softshell mid-layer handles active climbing in cold but dry conditions. A synthetic or down insulation layer adds warmth during rest stops and bivouacs.
Outer layer (storm shell): A waterproof breathable membrane storm shell blocks wind and precipitation while allowing vapor to escape during high-output movement. Pit zips or chest vents help manage breathability on steep sections.
Gear Longevity: Making Your Investment Last
Mountaineering gear is expensive. Well-maintained gear lasts far longer than most beginners expect, and sustainability-conscious purchasing saves money over time.
Boots: Clean mud and dry thoroughly after each use. Resole leather mountaineering boots rather than replacing them; a resoling job costs a fraction of a new pair.
Crampons: Dry completely after use. A light coat of oil on steel points prevents rust. Sharpen points with a file when they round off; dull crampons on hard ice are a safety issue.
Ropes: Retire a dynamic rope after any significant fall, visible core damage, or after roughly five years of regular use. Store loosely coiled in a cool, dry location away from UV exposure. The Outdoor Industry Association on gear care and sustainability provides detailed care guidelines for technical equipment.
Harnesses and helmets: Retire a harness after 10 years from manufacture date (marked on the label) or immediately after any significant fall or impact. Helmets should be retired after any impact, even if damage isn't visible; the foam liner compresses permanently.
Packs and apparel: Wash technical fabrics with specialized cleaners that preserve the waterproof breathable membrane's durable water repellent treatment. Re-treat with spray-on DWR after washing.
A practical maintenance checklist:
- Inspect crampon points and anti-balling plates before each season
- Check harness stitching and buckles for wear or fraying
- Test rope for stiffness, sheath damage, or flat spots after each trip
- Clean and re-treat waterproof breathable membrane shells twice per season
- Inspect ice axe head and spike for cracks or looseness
- Check helmet foam and shell for any impact damage before each use
- Dry all gear fully before storage to prevent mold and material degradation
Buying quality gear and maintaining it properly is the most sustainable approach to mountaineering equipment. Gear that lasts 10-15 years with proper care produces far less waste than cheap gear replaced every two seasons.
Getting started in mountaineering means confronting a lot of gear decisions at once, and the stakes are real, this equipment protects your life on technical terrain. AdventureTrailhead offers a comprehensive selection of mountaineering-ready footwear, packs, sleep systems, and navigation tools designed for outdoor enthusiasts serious about getting it right from the start. Build your beginner kit with confidence.
Frequently Asked Questions
What is the best climbing gear for beginners?
The best beginner mountaineering gear starts with stiff-soled boots that have crampon compatibility, a certified climbing helmet, a fitted alpine harness with adjustable leg loops, crampons rated for your terrain, and a 30-40L pack for load distribution. Add a belay device, a dynamic rope, and a layering system built around base layer moisture management, insulation, and a waterproof breathable storm shell. You do not need to buy everything at once, prioritize safety-critical items first.
How do I choose the right mountaineering boots for beginners?
Focus on three things: sole stiffness, crampon compatibility, and fit. A B2-rated boot handles most glacier travel and moderate technical terrain, while a B3 is reserved for steep ice routes. Try boots on with your actual mountaineering socks and check for heel lift. Waterproof breathable membrane liners help in mixed conditions. Beginners often size up half a size to allow insulation layers, which prevents cold-related numbness on longer ascents.
Is mountaineering an expensive hobby?
A complete beginner kit, boots, crampons, helmet, harness, ice axe, pack, apparel layers, and a belay device, typically runs $800 to $2,000 when purchased new. Renting technical items like crampons and ice axes from a guide service or outfitter for your first one or two trips cuts that upfront cost significantly. Buying durable, mid-range gear that you can grow into is smarter than buying cheap items you will replace within a season.
Do I need to buy all my mountaineering gear at once?
No. Start with the items that must fit your body precisely: boots, harness, and helmet. These cannot be easily borrowed or rented because fit directly affects safety and performance. Rent crampons, ice axes, and ropes for your first few outings to confirm the sport suits you before committing to the full purchase. Once you know your preferred terrain and frequency, invest in technical tools and apparel built for those specific conditions.
What are the 10 essentials for mountaineering?
The core 10 essentials for mountaineering are: stiff mountaineering boots with crampon compatibility, crampons matched to boot rating, an ice axe for self-arrest on glacier travel, a certified helmet, an alpine harness with adjustable leg loops, a dynamic rope and belay device, a navigation tool (map, compass, or GPS), a headlamp with spare batteries, a layering system including a waterproof breathable storm shell, and a first aid kit. A well-fitted pack with good load distribution ties it all together.
This article was written using GrandRanker