
Paddleboard Losing Air After Storage? Fix It Fast
Table of Contents
- Why Your Paddleboard Loses Air After Storage
- How to Find a Leak in an Inflatable Paddleboard
- Inflatable Paddleboard Valve Maintenance
- How to Store an Inflatable Paddleboard
- Repairing Pinhole Leaks and Seam Separation
- Frequently Asked Questions
Last Updated: September 17, 2026
Why Your Paddleboard Loses Air After Storage
Finding your paddleboard losing air slowly after storage is one of the most common frustrations in paddleboarding. The good news: most slow leaks come from temperature swings or a loose valve, not a ruined board. This guide from AdventureTrailhead walks you through every cause and fix.
Here's what most guides get wrong. They tell you to dunk the board in water and hunt for bubbles. That works, but it misses the two most likely culprits: cold air and a valve that just needs a quarter turn.
Below, we'll show you exactly how to tell the difference between normal pressure loss and a real leak, then fix it in under an hour.
Temperature Changes and PSI Drop
Cold air is the number one reason a board seems to lose pressure overnight. When the temperature drops, the air inside your board contracts. A board inflated to 15 PSI on a hot afternoon can read 11 or 12 PSI the next morning. Nothing is wrong with the board.
This is called thermal expansion and contraction.
Real Leaks vs. Normal Pressure Loss
A real leak keeps losing air even when the temperature stays steady. Normal pressure loss does not. That's the whole test.
Here's how to tell them apart:
- Normal loss: Pressure drops overnight in cold air, holds steady after reinflation
- Slow leak: Pressure drops a little every few hours, regardless of temperature
- Fast leak: You can hear hissing, or the board goes soft within an hour
- Valve leak: Air escapes only when you press or wiggle the valve
How to Find a Leak in an Inflatable Paddleboard
The fastest way to find a leak in an inflatable paddleboard is the soapy water test. It takes about 15 minutes and finds pinhole leaks, seam separation, and valve leaks that a visual check will miss.
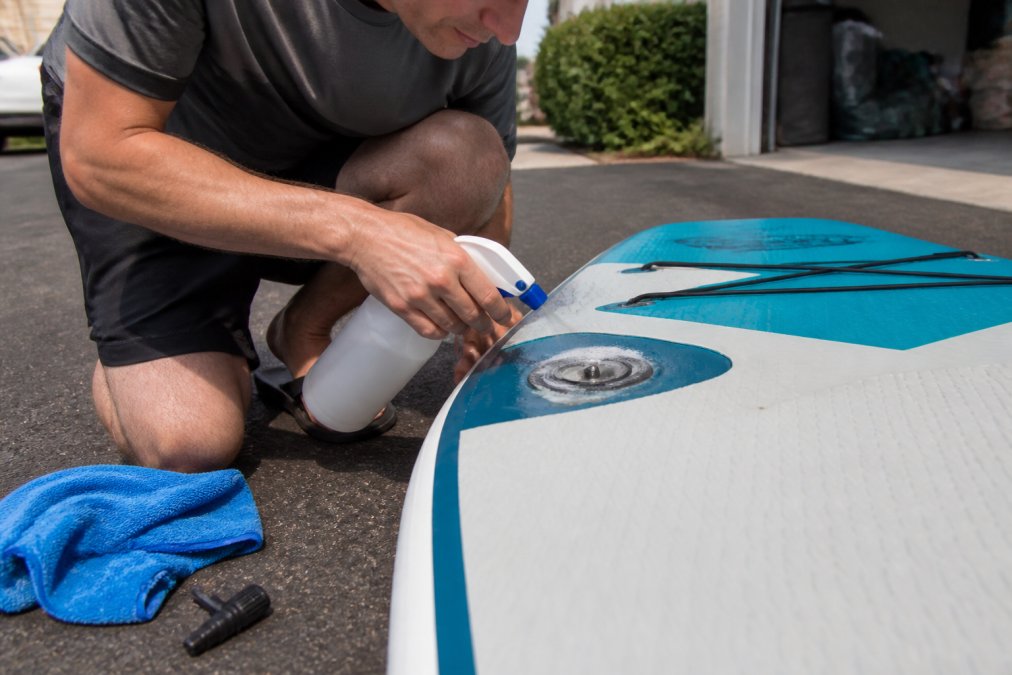
The Soapy Water Test
Mix a few drops of dish soap into a spray bottle of water. Spray the whole board, section by section. Watch for air bubbles forming and growing.
- The valve core and the ring around it
- Every seam, especially the rail seams along the edge
- The fin box area
- Any spot with a visible scratch or scuff
- The deck pad edges, where glue can lift
Checking Seams and the Valve Housing
Seam separation is the leak you can't fix with a patch kit. Run your fingers along every seam and look for lifting, white stress lines, or a gap where the two layers of material have pulled apart.
Inflatable Paddleboard Valve Maintenance
Valve maintenance is the most overlooked part of owning an iSUP, and it's where most "mystery" leaks start. A valve that isn't fully tight will bleed air slowly for weeks before you notice. Understanding how the valve is built makes the fix obvious.
How the Valve Actually Works
A standard iSUP valve has three separate sealing points, and a leak at any one of them looks identical from the outside:
- The valve core, the spring-loaded plunger inside the valve that opens when you push the pump fitting in. It seals against its seat when released.
- The O-ring, a small rubber ring that sits on the core and forms the primary air seal. This is the part that flattens, cracks, or picks up grit.
- The valve housing, the plastic ring bonded into the board material. It doesn't move or wear in normal use, but the bond between housing and board can fail.
Tightening the Valve Core and O-Ring
The valve core is the small metal or plastic piece inside the valve. It screws in and out, and it can work loose over a season of inflation and deflation.
Here's the process:
- Deflate the board completely.
- Use a valve wrench, the plastic tool that ships with most pumps, to turn the core clockwise, snug but not forced.
- Inspect the O-ring for cracks, flattening, or grit.
- Wipe the O-ring clean, or replace it if it looks worn. O-rings are inexpensive and sold in multi-packs.
- Reinstall the valve cap, which keeps dirt and sand out of the core.
Telling a Core Leak from a Housing Leak
This is the distinction that decides whether you fix it yourself or call the manufacturer. The soapy water test tells you where the bubbles are, but you also need to know which part is failing.
- Core or O-ring leak: Bubbles appear at the center of the valve, around the plunger. The valve may hiss when you press it. Tightening the core or replacing the O-ring usually solves it.
- Housing leak: Bubbles appear in a ring around the base of the valve, where the plastic meets the board. Wiggling the valve gently makes the bubbles worse or makes the housing move. This is a bond failure, not a seal failure.
Valve Replacement vs. Repair
Not every valve problem needs a new valve. Tightening the core and swapping the O-ring fixes most slow valve leaks. Full replacement is only needed when the housing itself has failed.
Use this to decide:
| Problem | Fix | Difficulty |
|---|---|---|
| Loose valve core | Tighten with valve wrench | Easy |
| Worn O-ring | Replace O-ring | Easy |
| Cracked valve cap | Replace cap | Easy |
| Leaking valve housing | Professional repair or warranty | Hard |
| Torn seam near valve | Professional repair or warranty | Hard |
Sourcing the Correct Replacement Valve
A few things to check before you buy:
- Valve type. Most modern iSUPs use a standard "bayonet" or "Halkey-Roberts"-style valve, but some budget boards use a smaller or proprietary fitting. Measure the outer diameter of the valve opening and compare it to the spec on the replacement.
- Core thread. Cores come in coarse and fine thread. If a replacement core threads in loosely or binds immediately, you have the wrong thread pitch.
- Pump compatibility. Your pump's fitting should lock into the new valve the same way it did the old one. If it doesn't click or twist-lock, the valve is the wrong type.
A valve that's clean, snug, and fitted with a fresh O-ring will hold pressure for a full season. If it still bleeds after that, the problem is almost certainly the housing, and that's a job for the manufacturer, not your workbench.
How to Store an Inflatable Paddleboard
Proper storage is what prevents most slow leaks in the first place. Heat, UV light, and tight folding all break down the material over time.
Seasonal Storage Checklist
- Rinse the board with fresh water and let it dry completely
- Deflate fully and remove the fin
- Clean and dry the valve area
- Fold loosely along the original fold lines, avoiding sharp creases
- Store in a cool, dry place away from UV light
- Keep the board off concrete floors, which can leach moisture
- Loosen the valve cap slightly to relieve pressure, then retighten
- Store the pump and repair kit with the board
Fold lines matter more than people think. Creasing the same spot every season weakens the PVC integrity there, and that's where pinhole leaks tend to appear.

Repairing Pinhole Leaks and Seam Separation
If you're shopping for a board built to handle this kind of wear, the 11 Feet Premium SUP Inflatable Stand Up Paddle Board with Accessories and Repair Kit ships with a reinforced drop stitch core and a repair kit included, so you're covered the first time a pinhole shows up.
Frequently Asked Questions
Is it normal for an inflatable SUP to lose a small amount of pressure over time?
Yes, a small PSI drop is normal. Air pressure changes with temperature, so a board inflated to 15 PSI in warm sun can read 12-13 PSI after a cool night. PVC also expands and contracts, which shifts internal pressure. If your board drops more than 2-3 PSI in 24 hours with no temperature change, that points to a real leak that needs the soapy water test.
Should I store my paddleboard fully inflated or deflated?
Deflate it for long-term storage. Leaving an iSUP fully inflated for months stresses the seams and valve housing, and temperature swings push pressure past safe limits. Clean and dry the board, deflate it to roughly 5 PSI, then roll it loosely without sharp folds. Store it flat in a cool, dry space away from direct sun and humidity to protect the PVC and prevent creasing along fold lines.
How can I tell if my paddleboard valve is leaking?
Spray soapy water around the valve base and inside the open valve. Bubbles forming at the valve core mean the core is loose and needs tightening with a valve wrench; bubbles at the housing mean the seal has failed. A loose valve cap also lets grit into the O-ring. If tightening does not stop the bubbles, the valve likely needs replacement rather than repair.
What is the lifespan of an inflatable paddleboard?
A well-maintained inflatable SUP typically lasts 5 to 10 years. UV exposure, humidity, and repeated folding speed up material breakdown, while proper deflation, fresh water rinses, and dry storage extend it. Watch for seam separation, sticky or chalky PVC, and slow leaks that return after repair. Those are signs the material itself is degrading, not just a single failing part.
A slow leak after storage is almost always fixable, whether it's cold air, a loose valve, or a small puncture. The trick is diagnosing it correctly before you start patching. At AdventureTrailhead, we stock water sports gear built for real conditions, including boards with reinforced drop stitch cores, stainless steel D-rings, and repair kits in the box. Get started with AdventureTrailhead and head back to the water with a board you can trust.